Hello friends and welcome to Obsidian Soft,
.png)
In today’s class, we will make a camera app using which we can take pictures. We will also add image viewing features to it so that we can look at all the images taken through our app’s camera.
Let’s begin. Start a new project and call it MyCamera.
First of all upload images for the camera button and first, previous, next, and last image buttons.


I downloaded the images from:
I also resized these images to be 50 by 50 pixels.
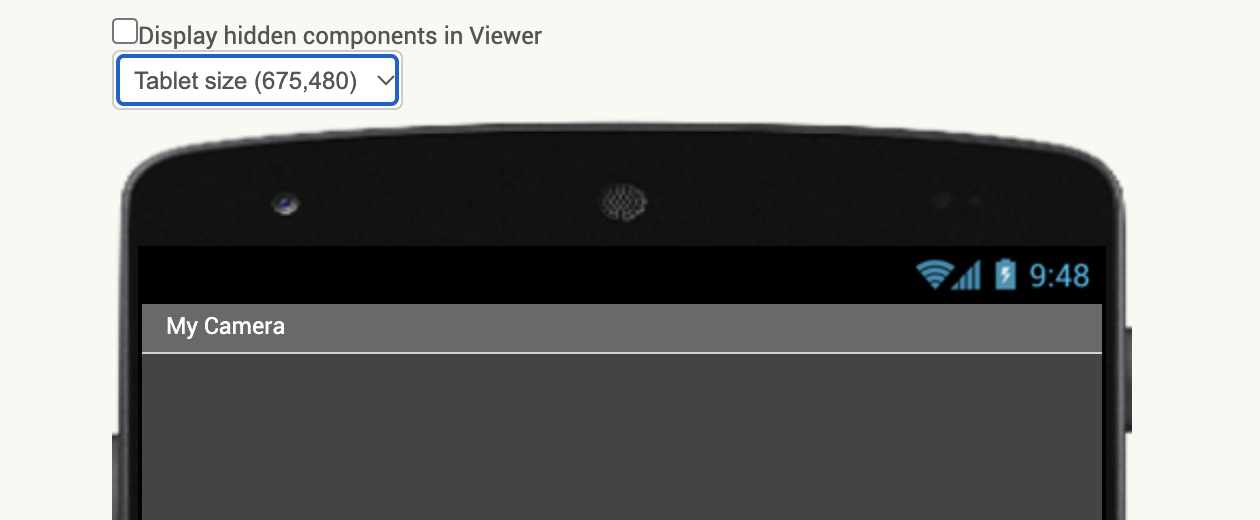
Now, for screen 1 properties, make the background dark gray and the screen orientation portrait.
Make sure that the default file scope is “App”
Change the title text to My Camera.
Drag and drop an image from the user interface.
For the image properties, make height and width fill parent and make sure that “scale picture to fit” is checked.
Drag and drop a horizontal arrangement from the layout. Make align horizontal and align vertical both center. Make height 15% and width fill parent.
Drag and drop a button from the user interface inside this horizontal arrangement. Rename it to cameraBtn. And choose cameraIBtnImg from uploaded media as the image for this button. Remove text from it. Add a 1% width label with no text on the right of this cameraBtn. This is for spacing between the buttons. Duplicate cameraBtn by selecting it and pressing Ctrl + C and Ctrl + V for Windows or Command + C and Command + V for MacOS. Rename it to firstBtn. Change image to firstBtnImg. Again add space on the right of it using a 1% empty label. Similarly, add previousBtn, nextBtn, and lastBtn. You may have to change view to tablet mode for adding the lastBtn.
Drag and drop a Camera component from the Media.
Drag and drop a TinyDB component from the Storage.
Screen Design is done.
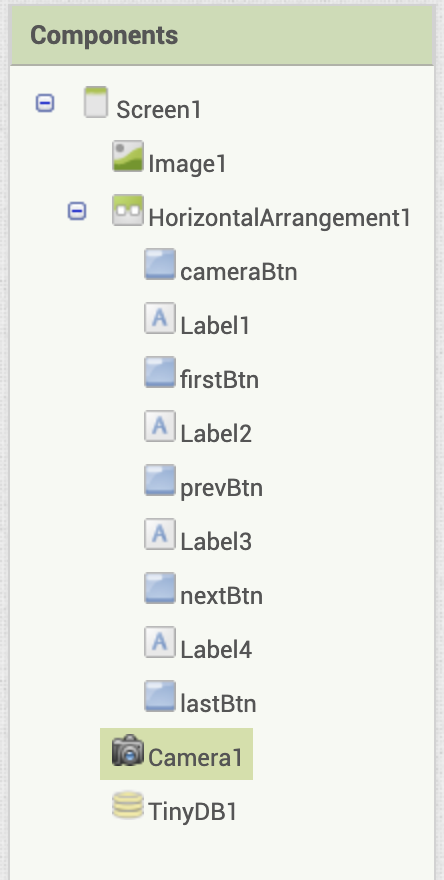
Your project components should look similar to this:
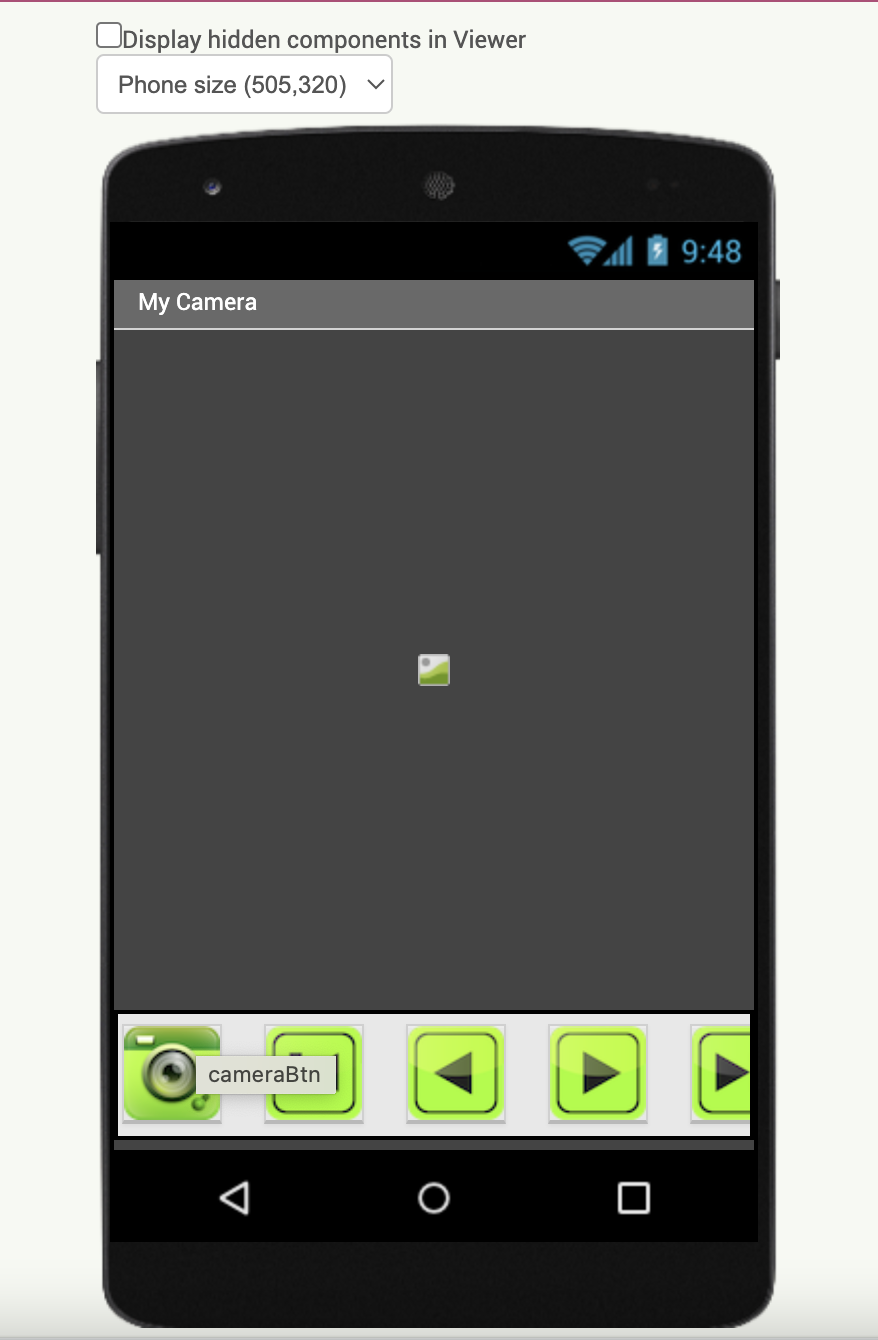
And, your screen in the Viewer should look like this.
Let’s work on the code now so go to the blocks section.
Let me explain first how the camera component works in MIT App Inventor.
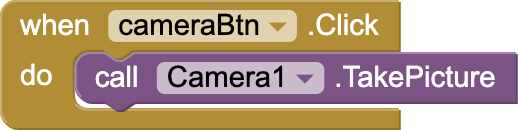
We want our camera component to take a picture when the cameraBtn is clicked so get the click event for cameraBtn and call camera’s TakePicture procedure.
Select camera1 again. You will see that it has an AfterPicture event. Drag and drop it too in your blocks.
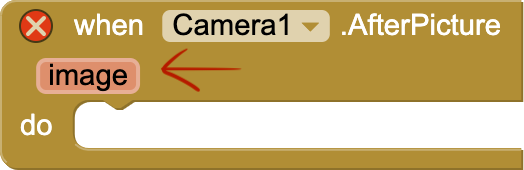
The AfterPicture event gives us an image but don’t be confused. This is not an image but the address or location of where the image is.
What we are going to do is that after each picture is taken by our camera, we will store the picture’s location inside our imagesList.
Hence, we need a global variable for our imagesList which again I will reiterate is not a list of digital pictures but instead the location of those pictures.

We also need a global variable for maintaining the index or position within this list so that we know which image should be shown when the next, previous, first, or last button is clicked. Initialize it to 1.

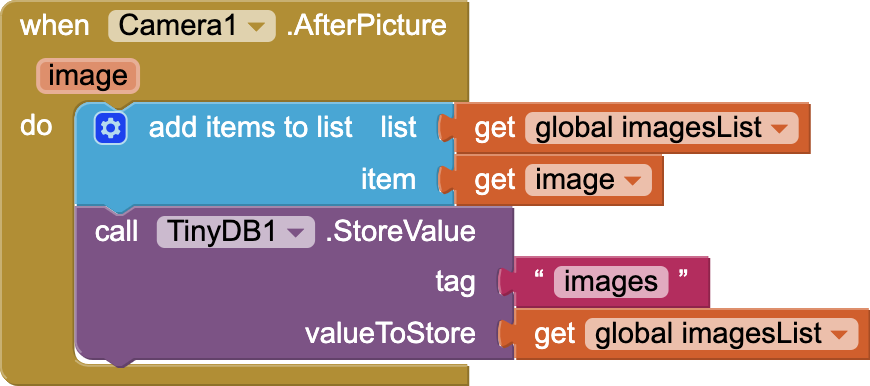
Now, let’s work on our Camera1.TakePicture event. We will store the new image address in our imagesList and we will further store this imagesList in the tinyDB so that whenever we start the app, we are able to see our previous images.
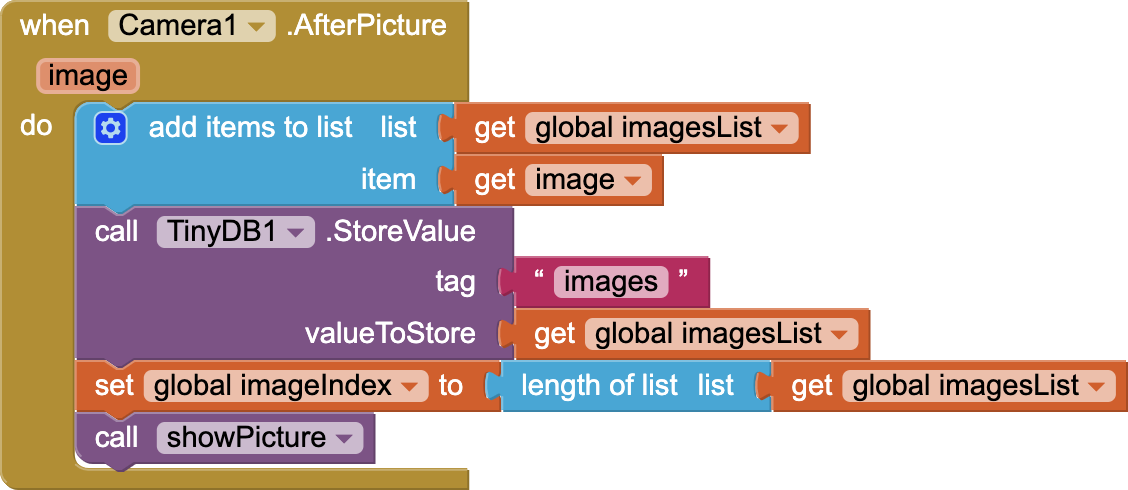
Next, within the same event, we want to update the index to the size of imagesList and set our image component’s picture value with the image at that index.

We are going to make a procedure for setting the image component’s picture value. The picture value will be loaded with the actual digital picture at that location and this way shown to the user.

Now, call this procedure from the AfterPicture event.
Our final AfterPicture event will look like this:
Now, let’s work on our screen initialize event. When the screen is initialized, we should get the images’ locations from tinyDB.
If the list length is greater than 0, we will show the picture at the index = 1 when the app is started i.e. the first image otherwise we will call TakePicture because this means that no pictures have been taken with our app so far.
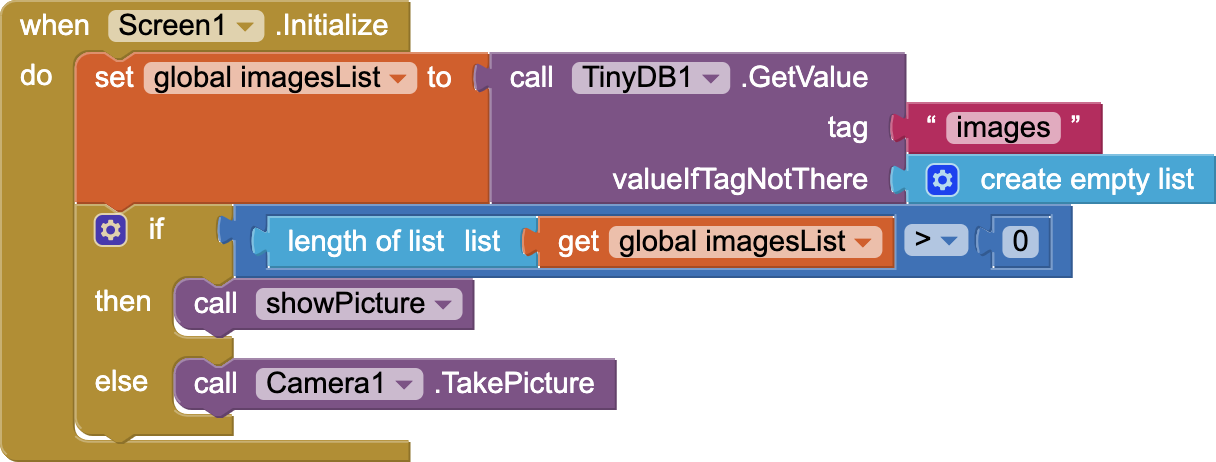
Another important thing to do for Android devices is to rotate the image 90 degrees. You don’t have to do this for iPhones.

Now, let’s work on our position buttons.
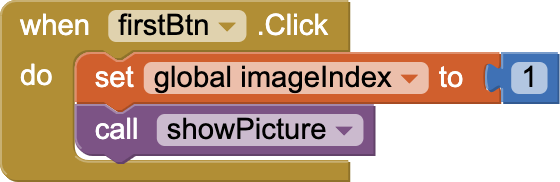
The First button will show the image at index =1
The Last Button will show the image at index = length of imagesList.

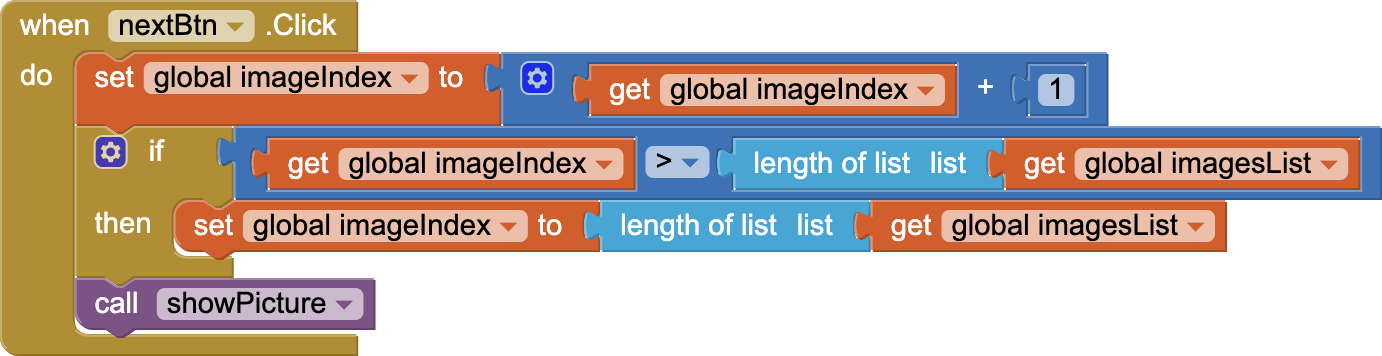
The Next button will add a 1 to the index but before showing the image we will check if the index has become greater than the length or size of imagesList. If it has then this should be not allowed as it will give an error because we are trying to access an index that doesn’t even exist in our imagesList( index out of bounds error) so we will put it back to the length of imagesList. In the end we will call showPicture procedure.
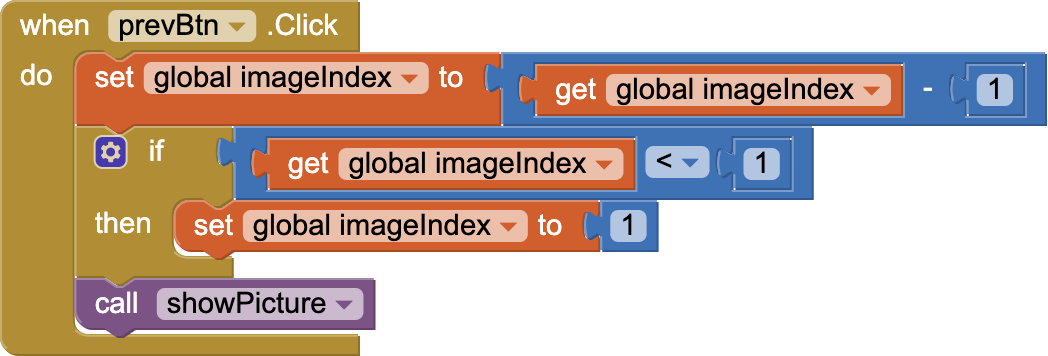
The previous button will subtract a 1 from the index but before showing the image we will check if the index has become less than 1. If it has, we will put it back to 1 to avoid an index out-of-bounds error. In the end, we will call the showPicture procedure.
So, we are done. This app will work for both iPhone and Android.
If you like my tutorials, consider supporting me:

You can also download the project file i.e. the aia file from below:
The video tutorial is here:
Please like my videos and share it with your friends and family. Also, subscribe to my channel and press the bell icon so you don’t miss any of the great projects I have planned for you.
https://www.youtube.com/c/obsidiansofteducation
Please like my Facebook page and Instagram page for more educational resources and tips.
Facebook: https://www.facebook.com/ObsidianSoft/
Instagram: https://www.instagram.com/obsidiansoftapps/
Pinterest:
For links to free educational apps, have a look at the educational apps page