Hello friends,
Welcome to Obsidian Soft!
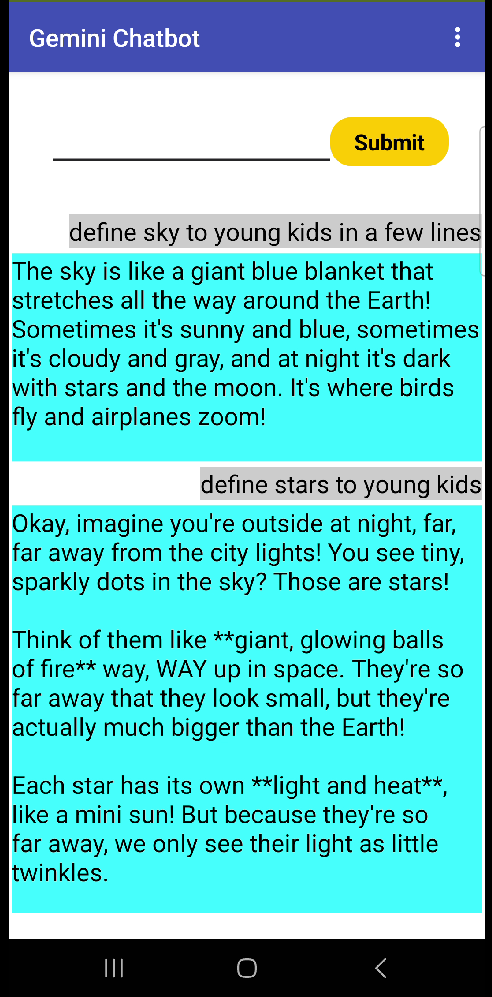
In this tutorial, I will teach you how to add dynamic components to your MIT App Inventor app to give a more elegant look to your apps. You can use such dynamic components such as dynamic labels in chatting apps or chatbots to give a WhatsApp or Facebook Messenger like professional look. The following picture shows a Gemini AI chatbot built using dynamic components.
For this, we need an amazing extension and a big round of applause for the developer!
Download the dynamic components extension:
https://github.com/ysfchn/DynamicComponents-AI2/releases
Open up MIT App Inventor.
https://ai2.appinventor.mit.edu
Start a new project in MIT App Inventor or open a preexisting one (if you are coming here after making a basic Google Gemini AI Chatbot in MIT App Inventor).
Follow the following steps only if you are working on your Gemini Google AI Chatbot preexisting project:
Remove the temporary label that we had placed in the vertical scroll arrangement.
Follow the following steps only if you are working on a new project:
Make screen orientation portrait. Add a Horizontal Arrangement from Layouts palette onto the viewer. Make align horizontal and align vertical both center in the arrangement’s properties. Also, make width fill parent and height 15%. Drag and drop a text box and button from the user interface palette in this horizontal arrangement. Rename the button to submitBtn. In its properties, change text to Submit and make background color of button: orange. Drag a Vertical Scroll Arrangement from Layouts below the horizontal arrangement. Make the width fill parent and height 75%.
Import the downloaded extension under extensions tab on the left. After a successful import, drag its component onto the viewer.
Our UX design is done so go to the blocks section.
Add a global variable for msgCounter initialized to 1 and a variable for color initialized to any color you want.


Make a procedure called AddMessageBubble that takes in two inputs isUser and message. You will need to click on the cog wheel to add input variables. The isUser input variable is only needed if you are making a chatbot or chatting app where you want to distinguish between messages entered by user and messages by other people or the chatbot.
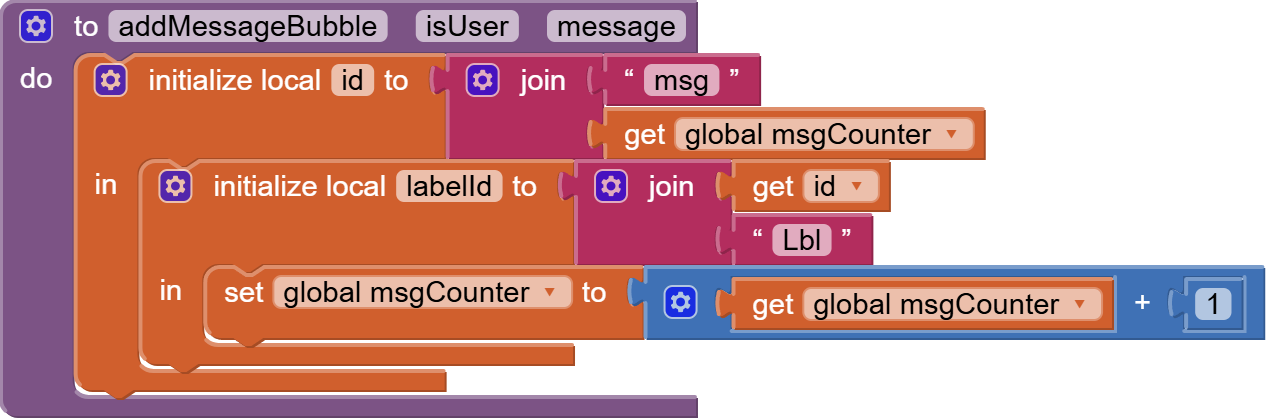
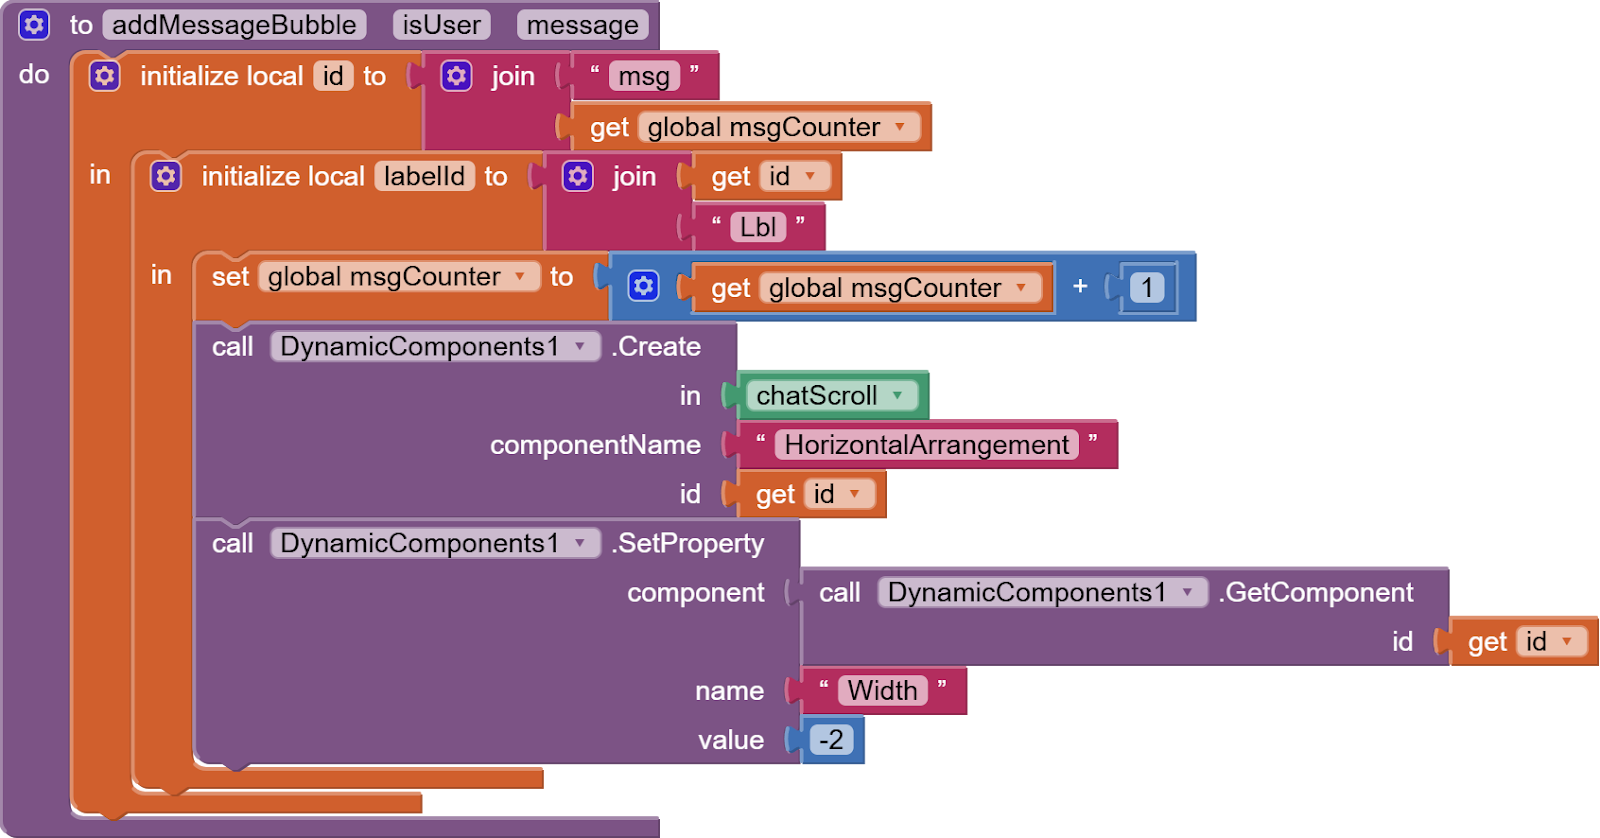
Make a local variable id and it should be a join of the word “msg” and msgCounter.
Make a local variable labelId and it should be a join of id and word “Lbl”
Next, increment the msgCounter global variable i.e. add 1 to it.
Now, create a dynamic horizontal arrangement in the chatScroll (the vertical scroll arrangement) and give it a width of fill parent by setting Width property to -2.
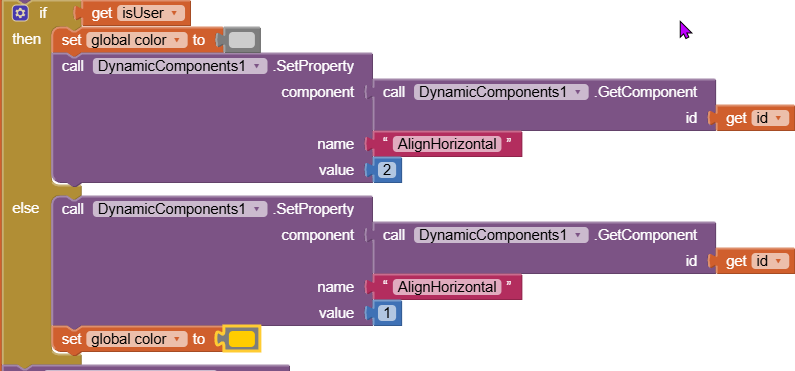
Next, we are going to check if isUser is true because this means that this message was entered by the user and should have a different background color. Use light colors so that black text looks prominent on them. We set the color global variable differently depending on isUser and we also align the horizontal arrangement towards the right if isUser and left if not isUser.
Next, we are going to actually add a label inside this dynamic horizontal arrangement and then set its properties.
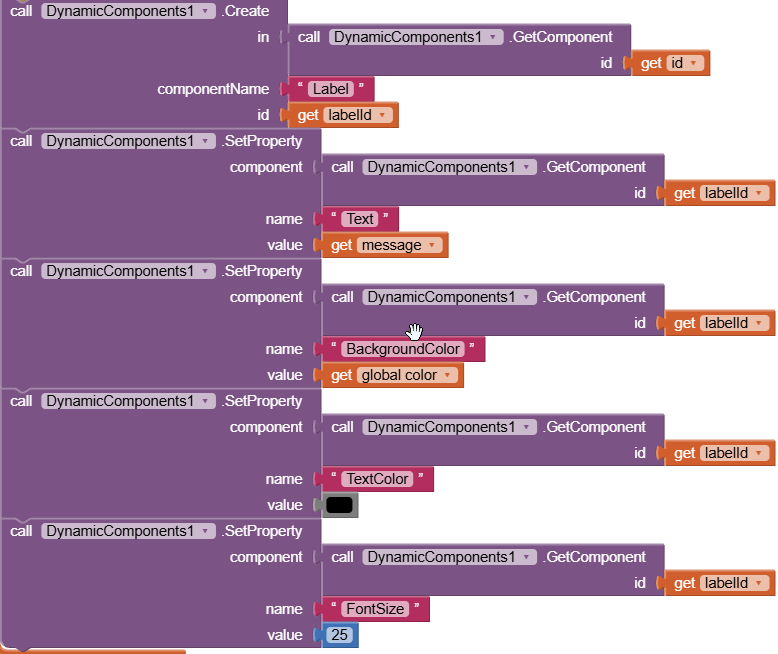
It is super important while using the dynamic components extension that you use exact spellings as shown in this tutorial.
Now, call this procedure when you need to create such dynamic labels. Remember to provide an isUser value as true or false depending on if the message is by the user or by someone else.
The following code demonstrates where to call it if you are making a Google Gemini AI Chatbot app:
We need to call this procedure from two places. At the beginning of sendBtn click event:
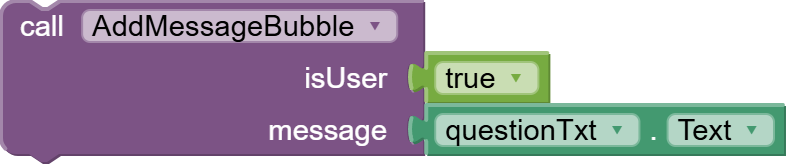
And at the end of web1.gotText event where we had previously placed the setting of the temporary label.

And now your chat with Gemini will look like the demo.
I hope you found this tutorial useful and educational.
You can have a look at the video tutorial too:
Please like my videos and share them with your friends and family. Also, subscribe to my channel and press the bell icon so you don’t miss any of the great projects I have planned for you:
https://www.youtube.com/c/obsidiansofteducation
Please like my social media pages for more educational resources and tips.
Facebook: https://www.facebook.com/ObsidianSoft/
Instagram: https://www.instagram.com/obsidiansoftapps/
Pinterest: https://www.pinterest.com/obsidiansoft/
For links to free educational apps, have a look at the educational apps page