Hello friends,
Welcome to Obsidian Soft.
Today, I will show you how to make a Gemini AI Chatbot app in MIT App Inventor.
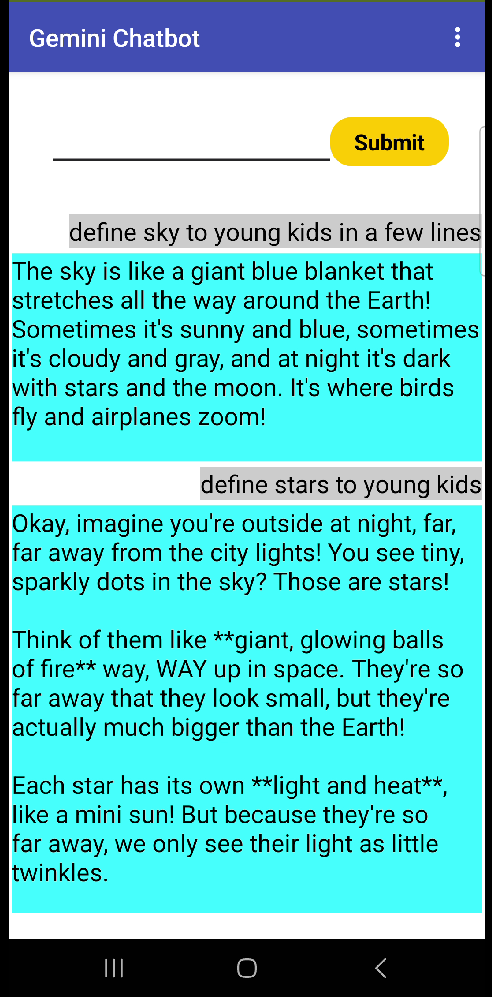
The main goal is to make a dynamic chat with Google’s Gemini AI. All your questions and Gemini responses will be shown using labels with different background colors. However, initially, we will make a basic chatbot and later we will incorporate dynamic components to make the front end just like the interface of WhatsApp or Messenger.
However, remember that this is not a basic level tutorial so you need to be comfortable with MIT app inventor to make this app.
First, let’s get the free API key for Gemini but keep in mind that its usage is not unlimited. I believe that it is 500 requests per day which is pretty good for a student-level app.
Visit https://ai.google/get-started/for-developers/
Click on get API key.
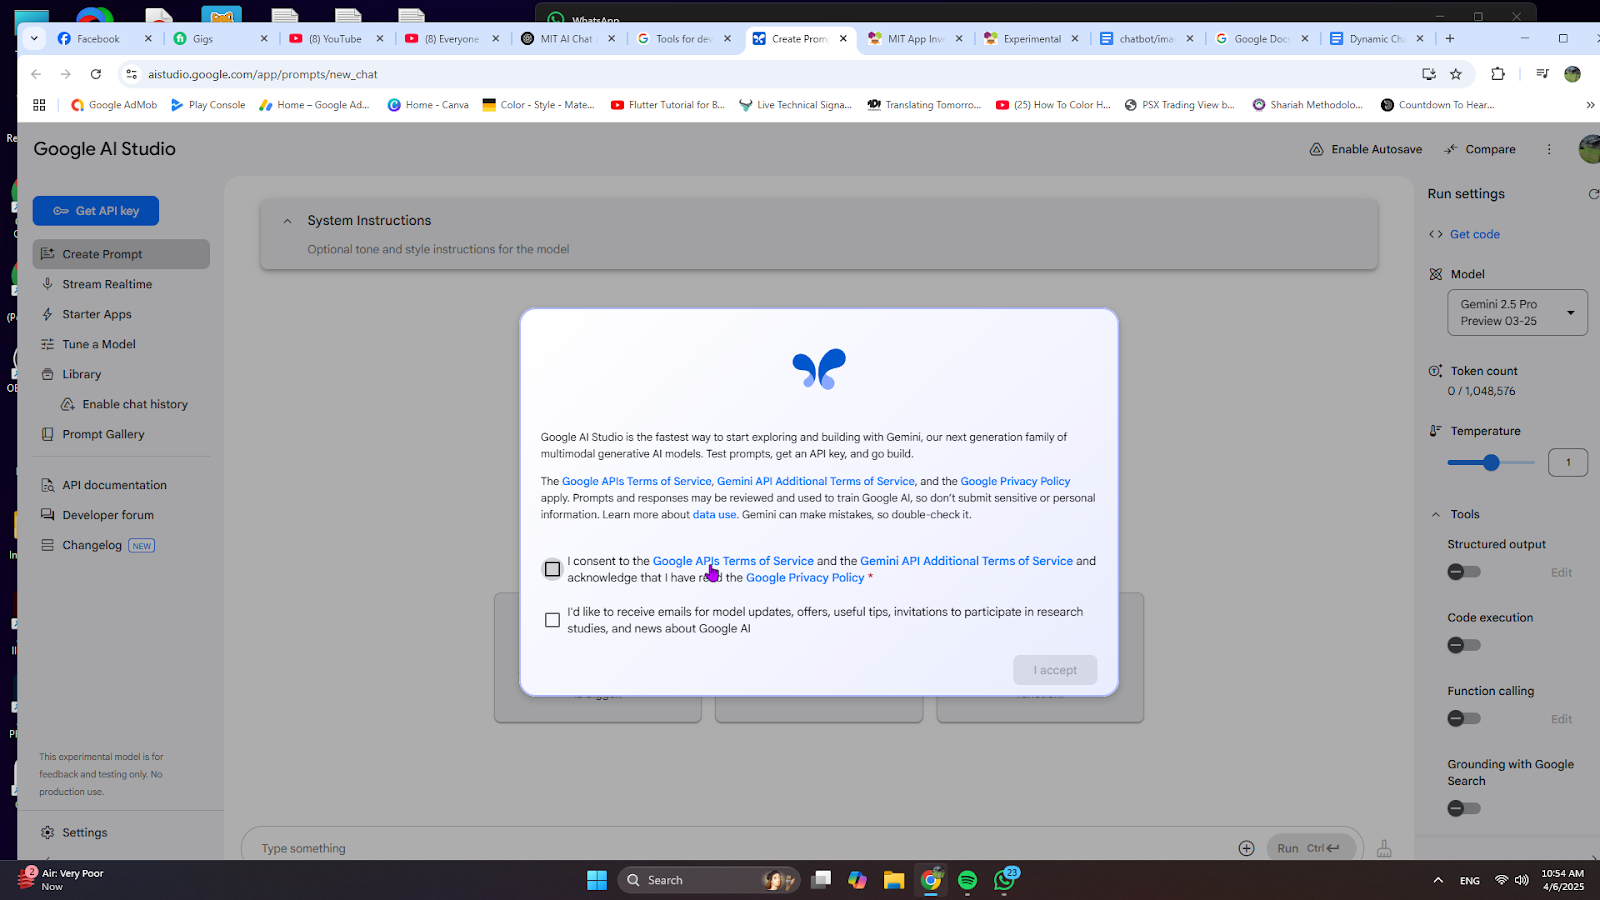
You must consent to the terms of service and optionally enroll in the email program. After the dialog is dismissed, click on the “get API key” button on the left.
Click on the Create API key button. Copy and paste your API key in a safe place. Don’t share it with anyone especially if you have a billing plan associated with that key.
Now, have a look at the curl command given above the API key. This is the tool or command for interacting with web APIs. Curl stands for client url.
curl "https://generativelanguage.googleapis.com/v1beta/models/gemini-2.0-flash:generateContent?key=GEMINI_API_KEY" \
-H 'Content-Type: application/json' \
-X POST \
-d '{
  "contents": [{
    "parts":[{"text": "Explain how AI works"}]
    }]
   }'
We have to convert this curl into blocks in our code.
Now, open up MIT App Inventor, start a new project and call it GeminiChatbot.
Make screen orientation portrait and change the title to Gemini Chatbot. Add a horizontal arrangement from the layout palette. Make align horizontal and align vertical both center in its property. Make width fill parent and height 15%.
Add a text box from the user interface palette inside this horizontal arrangement. Rename it to questionTxt. Make font bold and font size 18. Make width 70%. Add a button on the right of this text box. Rename to sendBtn. Make the background color orange, font bold, and font size 18. Make the width 20% and change the text to Send.
Add a vertical scroll arrangement below it and make its width fill parent and height 75%. Rename it to chatScroll.
Add a label inside it. This is a temporary label so I will not spend time on its properties. This is just for testing that our integration with Gemini is working. We will later replace it with dynamic labels.
Add a web component from the connectivity palette. We also need an extension for dynamic labels but I will get it later. Our basic UX design is done so let’s go to the blocks section.
We need a replyText global variable for containing the reply from Gemini servers.

Get the sendBtn click event and construct the web1.url by joining the URL given in curl script and your real API key. Use your own API key.
Then, we need to construct requestheaders by making a dictionary with the key Content-Type and the value application/json. Get all these words from the curl script to avoid spelling mistakes. Don’t use the API key given below as it will not work. You need to get your own API key and I have explained the process above.

Now, do this part super carefully as we need to construct the JSON to send to Gemini Servers.
Below the request headers part, call web1.postText with the following blocks. Do it slowly so that you don’t miss anything.

Inside this make a list empty slot, put in:

At the end of postText block, empty your questionTxt.

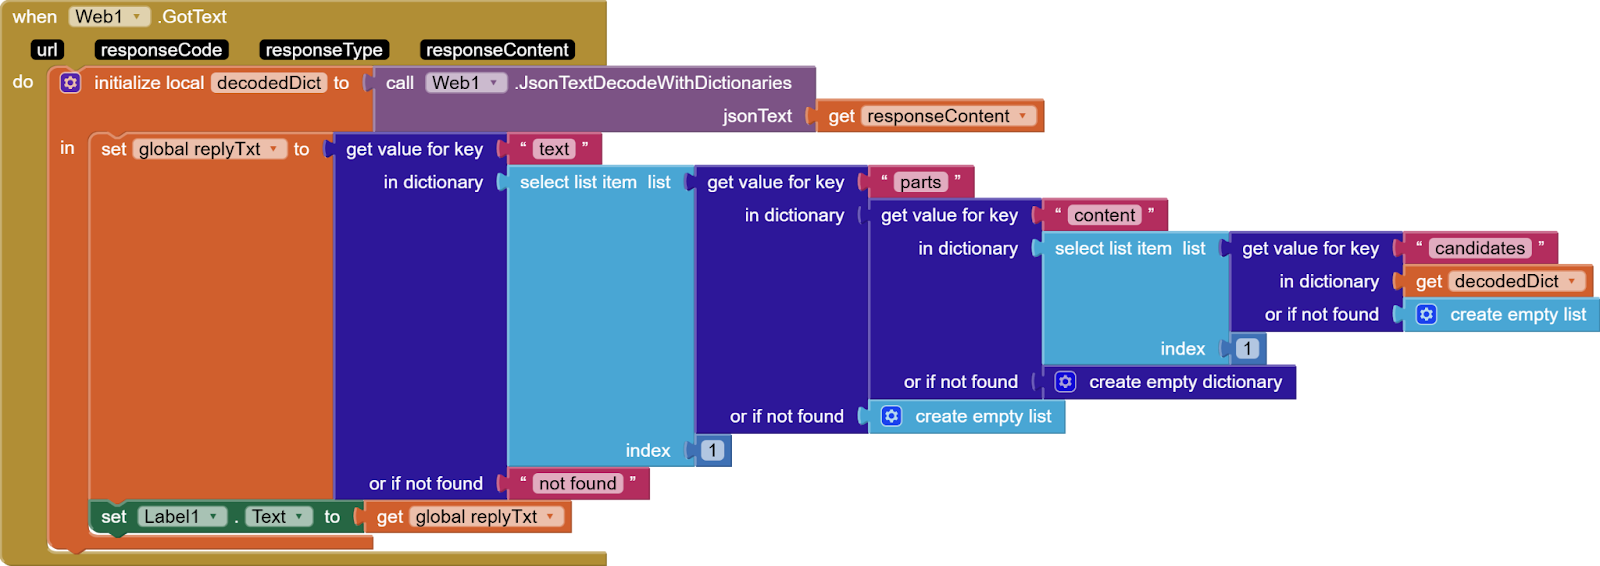
We are done with calling Gemini so let’s work on decoding the reply from Gemini.
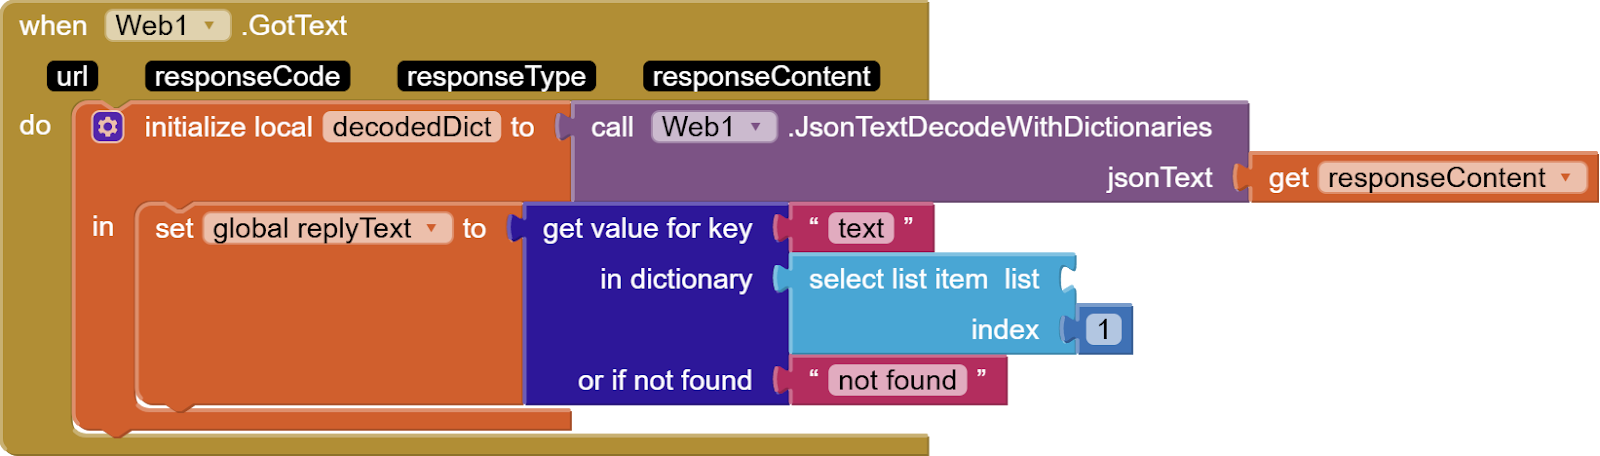
Remember that Web1.PostText event will trigger the Web1.GotText event.
Make a local variable decodedDict and give it the result of jsontextdecodewithdictionaries result with json text being the responseContent returned by the server.

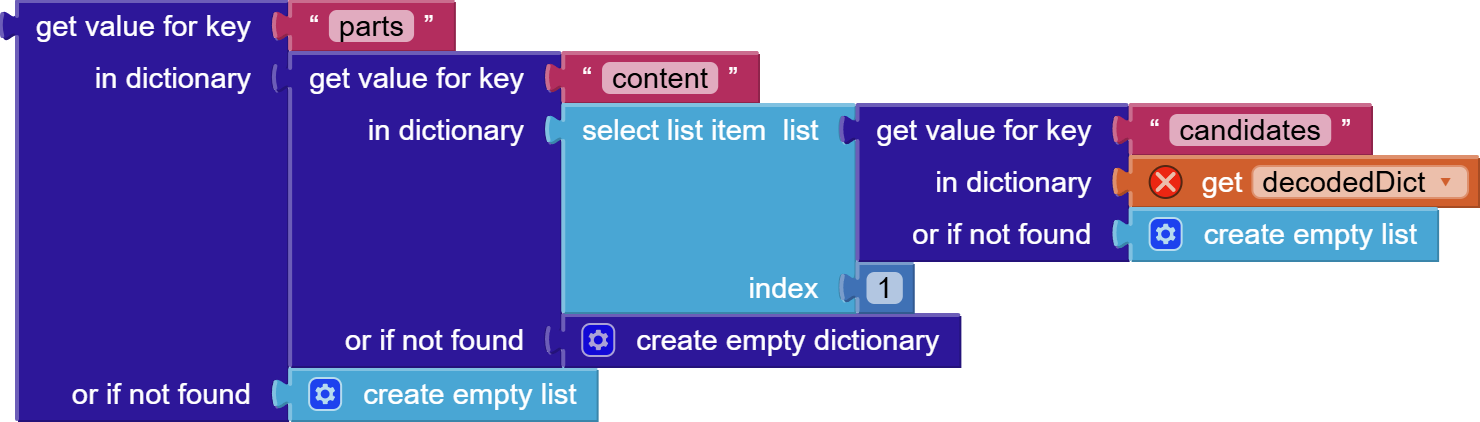
Start slowly setting the replyText global variable:
The list is:
At the end provide this replyText to the temporary label that we made:
And we are done with the basic integration with Gemini API. You can try the app now and send a question and get a response from Gemini if you have put together the blocks the way I showed in this tutorial.
Now, you can work on making this chatbot more professional. You can either use an avatar that speaks like the one I used for my ChatGPT tutorials or you can use dynamic components. If you want your chatbot to look like the one I showed in the demo picture i.e. with dynamic components then please go through the second part of the tutorial. I split the tutorial into two parts for the convenience of those followers who are only interested in learning how to integrate Google Gemini in MIT App inventor or who only want to learn about the usage of dynamic components in MIT App Inventor.
Part 2 Tutorial – How to use Dynamic Components in MIT App Inventor
You can also have a look at the video tutorial for basic Google AI Chatbot here:
Please like my videos and share them with your friends and family. Also, subscribe to my channel and press the bell icon so you don’t miss any of the great projects I have planned for you:
https://www.youtube.com/c/obsidiansofteducation
Please like my social media pages for more educational resources and tips.
Facebook: https://www.facebook.com/ObsidianSoft/
Instagram: https://www.instagram.com/obsidiansoftapps/
Pinterest: https://www.pinterest.com/obsidiansoft/
For links to free educational apps, have a look at the educational apps page