Hello friends and welcome to Obsidian Soft,
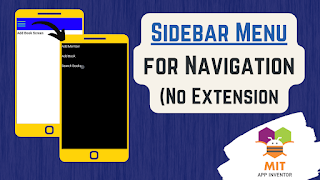
Today, I will teach you how to make a simple sidebar menu for navigation without extensions. I don’t like relying on them too much, as these extensions might become outdated, and most importantly, you can’t test them on iPhones.

So, let’s begin:
Start a new project in MIT App Inventor. Name it to Sidebar. Keep the toolkit: default (very important). Press OK.
Turn off the title bar as we will make a title bar ourselves with a button to open up the navigation menu or sidebar.
Now, add a horizontal arrangement from the layouts. Make align horizontal left in its properties. And color: blue. Make its width fill parent and height 10 pixels. Drag and drop a list picker from the user interface inside this horizontal arrangement. I will upload media for the menu button image that I got from Flaticon.
https://www.flaticon.com/free-icon/hamburger_5372882?term=menu&related_id=5372882
Make sure that you choose 64-pixels version for downloading.
In the list picker’s properties, choose the image that you uploaded. Make height and width 55 pixels for the list picker.
We will be using the concept of virtual screens.
Virtual screens mean more than one full-screen layout on a screen such as screen 1 and we show only one of them at one time. They are faster than separate screens as you will notice that the loading time of separate screens is much slower. Also, it is easier to pass data between two screens as you are technically on the same screen.
So, let’s add 3 virtual screens:
Add a vertical arrangement. Rename it to memberScreen. Make height and width fill parent. And make background-color: white
Add a label: and change the text to “Add Member Screen”. You can add all the components of your Add Member screen just like this label but make sure that they are inside this vertical arrangement called memberScreen.
Now, select this memberScreen and duplicate by pressing Ctrl + C and Ctrl + V on the keyboard for Windows OR Command + C and Command + V on the keyboard for MacOS.
Rename to bookScreen and change the text to “Add Book Screen”.
Duplicate one more time. Rename it to searchScreen and change the text to “Search books”. Now, turn off the visible checkbox for all screens except the memberScreen.
You can add as many screens as you want.
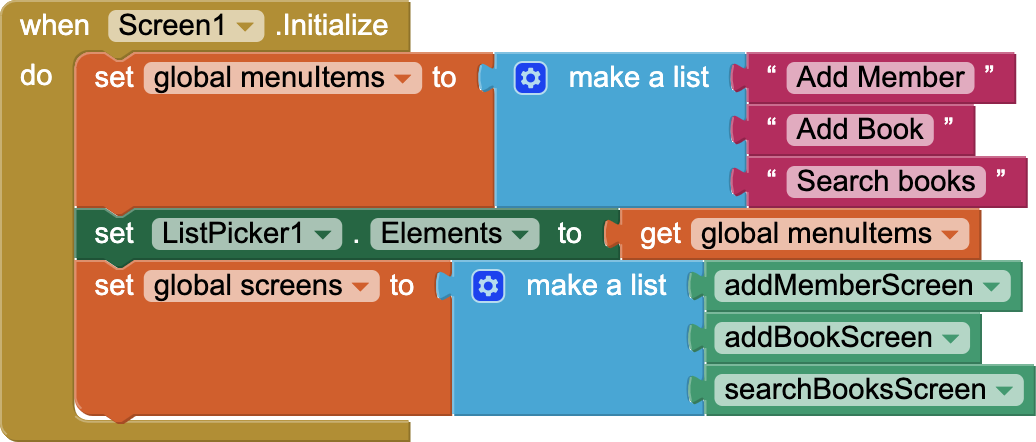
Now, let’s go to the blocks section. Add a global list variable for menu items and another list for our virtual screens. You will understand why I am making a list for our virtual screens later.


In screen1’s initialize event, add three text blocks to the menu items with appropriate text for your menu and then, set this list to the listpicker.Elements.
Also, add all your virtual screens to your screens list.

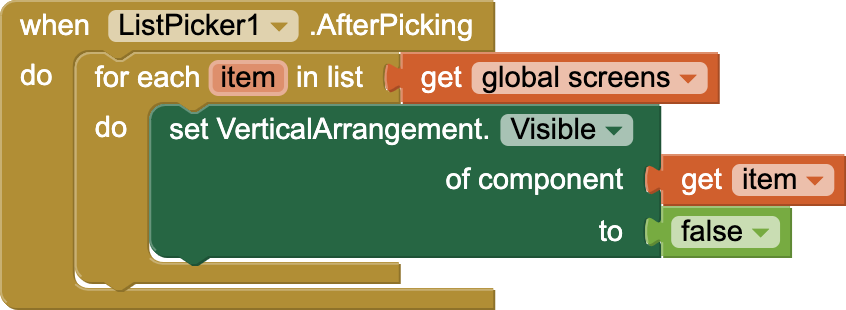
Now, whenever the user clicks on the list picker, our menu will open up with our 3 items. When the user selects any of these items, the list picker’s after-picking event will be triggered. In this event, first make all your screens invisible by using a for loop and any component block. This is the reason why I made a list of our virtual screens i.e. vertical arrangements.

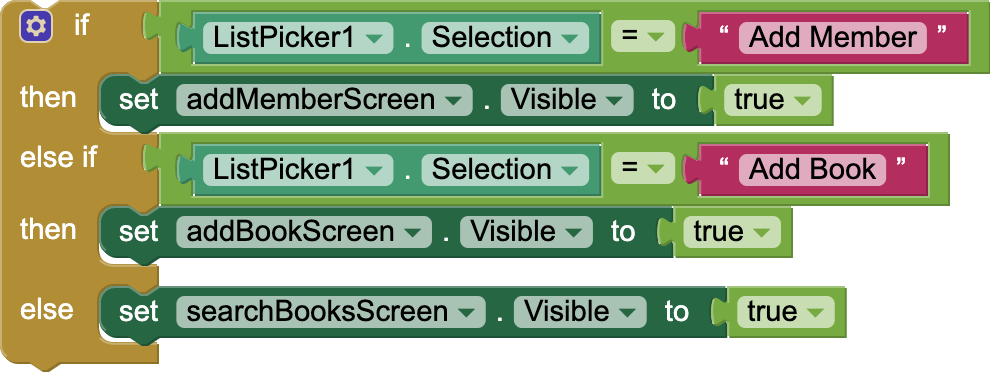
Next, just use a control if then else if then else block after the for loop block to see what the list picker’s selection is equal to and make the correct layout visible. Now, you don’t have to worry about other screens and making them invisible.

This simple but elegant solution for navigation is complete. I hope you like my easy version of side bar without using extensions that you can even use on iPhones.
Happy Coding!
You can also have a look at the video tutorial for this app:
Please like my videos and share them with your friends and family. Also, subscribe to my channel and press the bell icon so you don’t miss any of the great projects I have planned for you.
https://www.youtube.com/c/obsidiansofteducation
Please like my social media pages for more educational resources and tips.
Facebook: https://www.facebook.com/ObsidianSoft/
Instagram: https://www.instagram.com/obsidiansoftapps/
Pinterest:
For links to free educational apps, have a look at the educational apps page
