Hello friends,
Today, I will show you how to make an HTML table in MIT App Inventor. We normally use the built-in list view, and I have done extensive tutorials on it, including the diary app a few weeks ago, which taught how you can display images in a listview. However, if your data has multiple columns, such as data coming from a Google sheet, the data display isn’t that professional and clean. So, instead of a listview, we can display the data in an HTML table using a webviewer. This will work for both iOS and Android. We can also make the HTML table clickable, i.e., enable row selection, but I will teach that in a future advanced tutorial, as there is JavaScript involved. And that version will not work on iOS. I thought that I should start with an iOS-friendly approach first.
Our html table will look something like this:
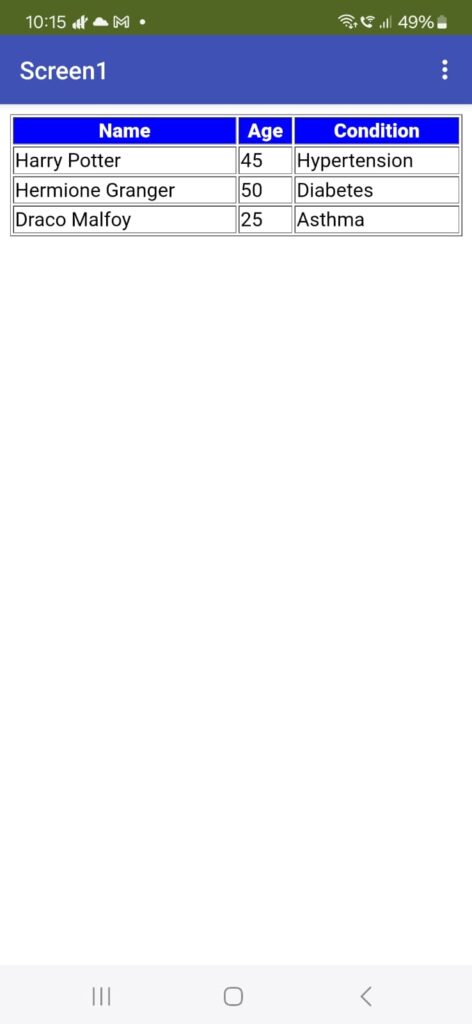
As you can see, we have a very professional-looking table with a blue header.
So, let’s begin. Open up MIT App Inventor. Go to projects. Start a new project. Let’s call it HtmlTable.
From the User Interface palette, drag and drop a WebViewer component.
Our UX design is done, so let’s go to the blocks section.
Make a global variable htmlContent and set it to a text block with the following code:

This is super important that you paste it the same way. You can get this code from the written tutorial link in the video description.
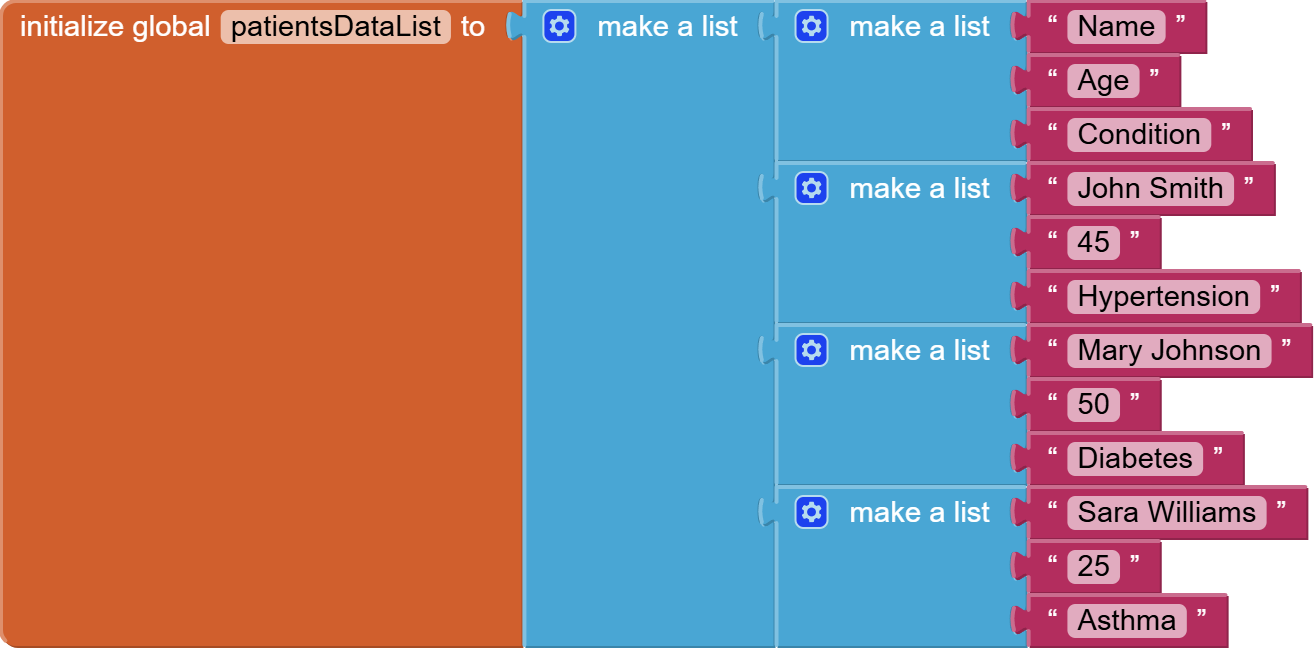
<html><head><meta charset="utf-8"><meta name="viewport" content="width=device-width, initial-scale=1"><title>Table</title></head><body><table border="1" width="100%">Next, for the purpose of this tutorial, I am going to make a 2D data list that will contain our table data. A 2D list in programming languages means a list where each item in the list is also a list.
Your list might be coming from CloudDB or Google Sheet, and I have already done tutorials on loading data from a Google Sheet and CloudDB.
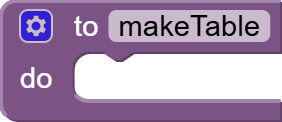
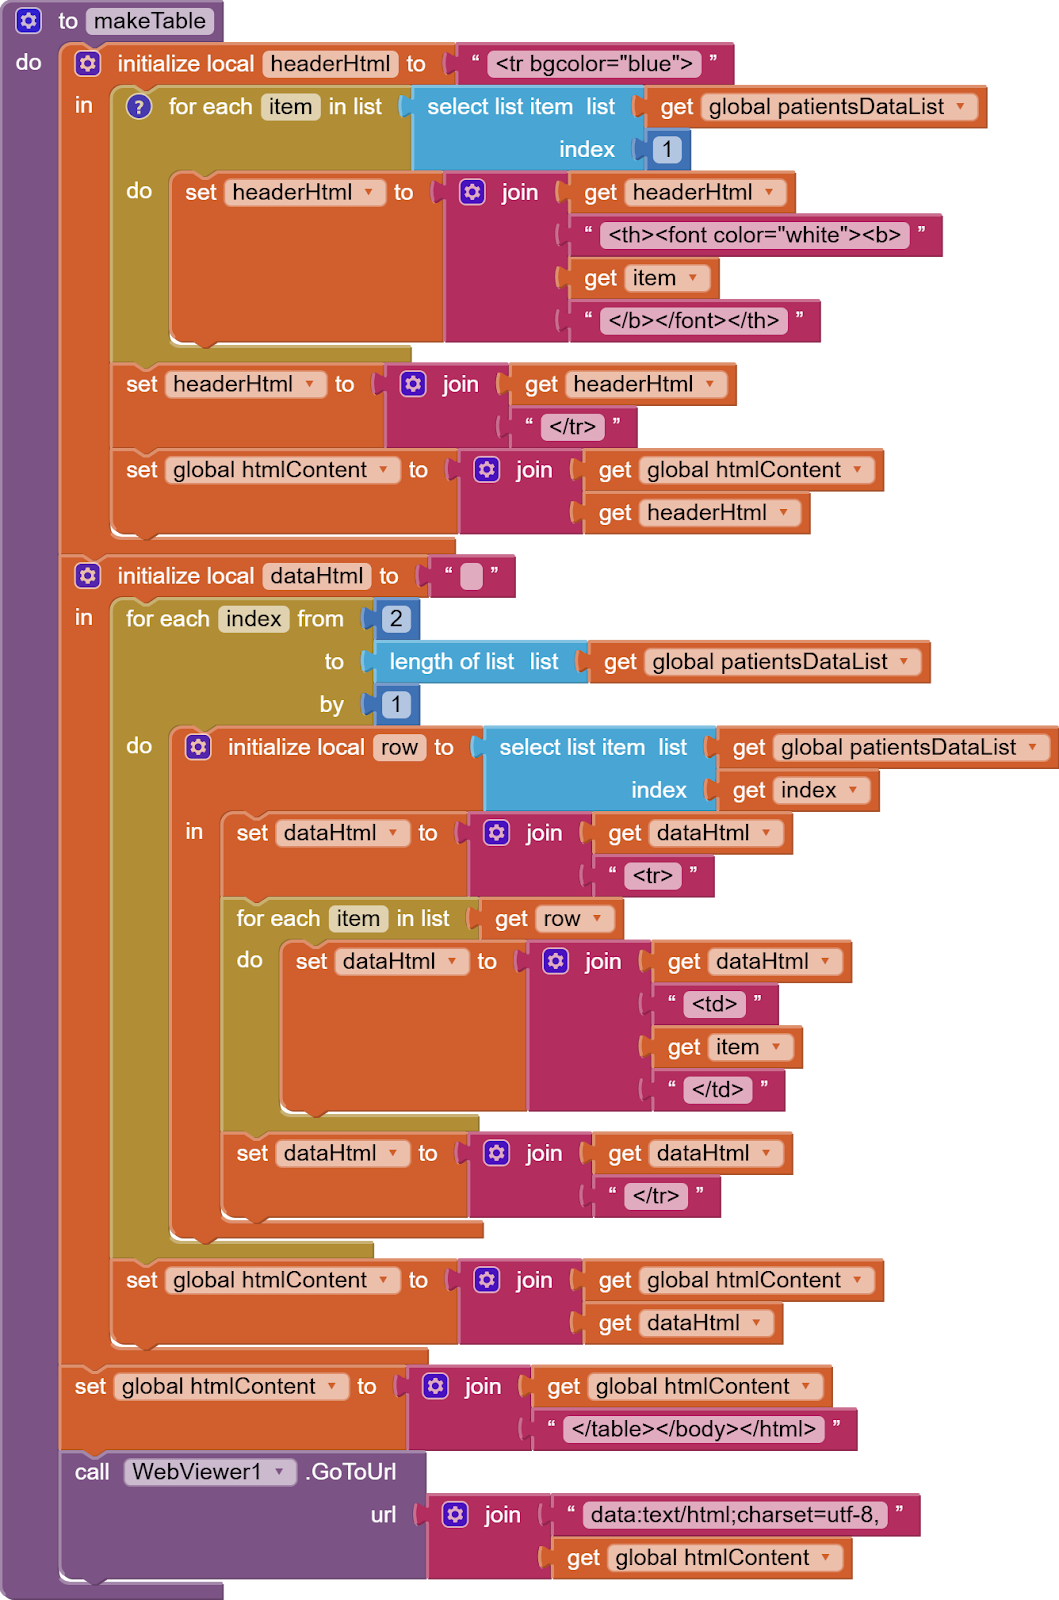
Next, make a procedure and name it makeTable.
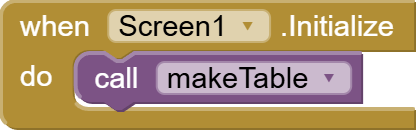
Call this procedure from the initialize event of Screen1.
Now, let’s work on the procedure’s code:
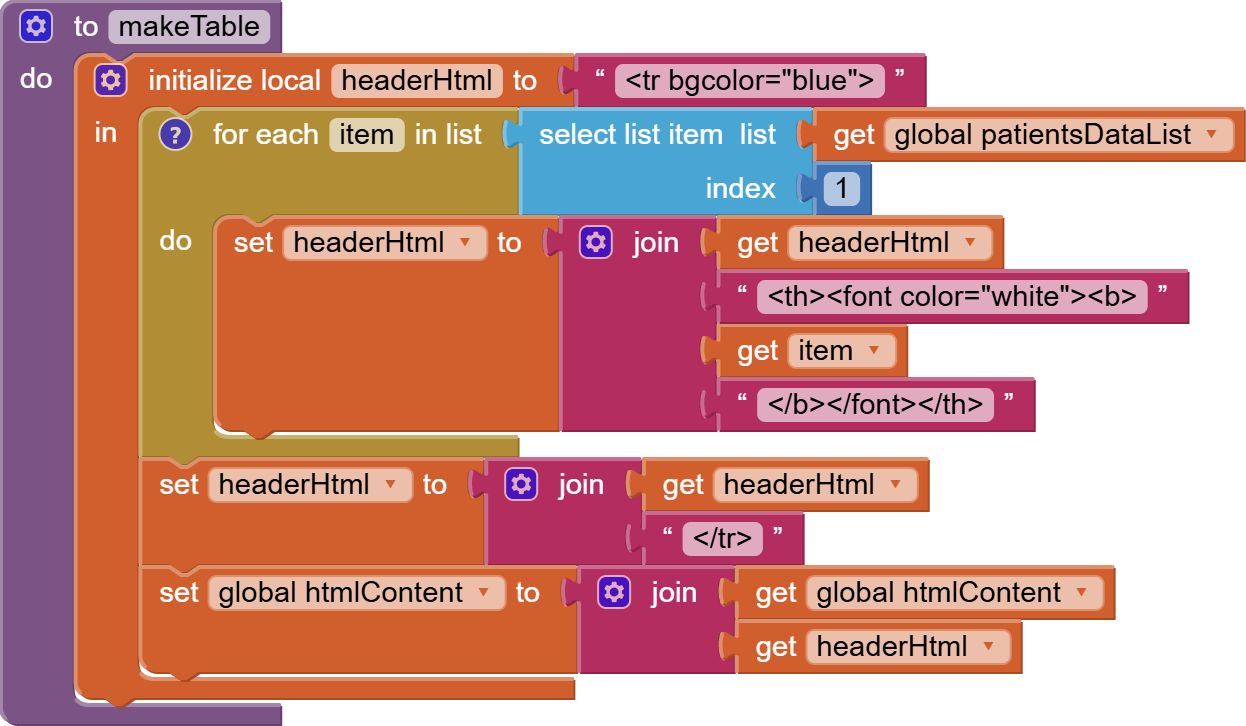
Our htmlText variable ended with the <table> being opened. Now, we will construct the table headers and table rows using our global list called data that we have already initialize with some patient data.
We make a local variable for our headerHTML and give it the starting row tag with a background color of blue. You can use some other color too.
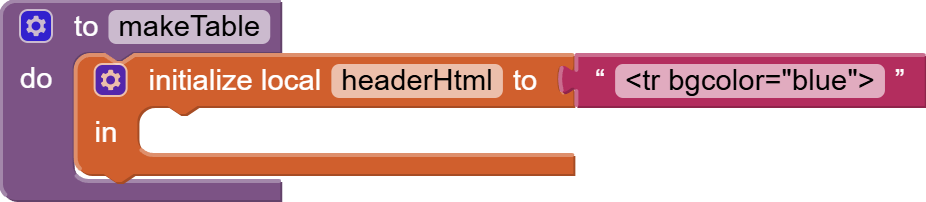
And then, using a for loop, we go through the first row of our patientsdatalist (or any other 2D list such as data coming from a Google Sheet), and we start adding <th> tags for table headers i.e., names of the columns. I will make them bold with font color white. The spellings and the order are very important while building this dynamic HTML string.

At the end, we join the </tr> i.e. the closing table row tag, to the header HTML. And we join this constructed headerhtml to our htmlText variable that had the table head and style HTML set in it. Make sure you do this within the local variable block.
Next, we construct the data rows. Again, make a local variable and put this outside the first local variable block.

Now, we will use a for each index block from Control as we need to start from index 2 of our patientsDataList since index 1 contained the column names or table headers. 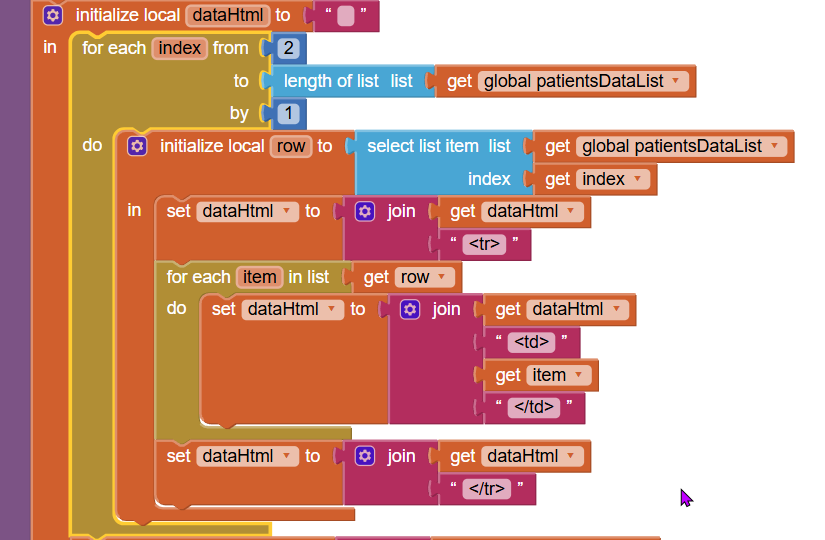
After the for loop, we will join the dynamically constructed dataHtml to our htmtContent string. Again, this has to be within the local dataHtml variable block.

Next, outside the local variable block, we will join the closing table, body and html tags to our htmlContent string and we will use the Webviewer goToUrl block with this final htmlContent string but we will also put this before it:
data:text/html;charset=utf-8,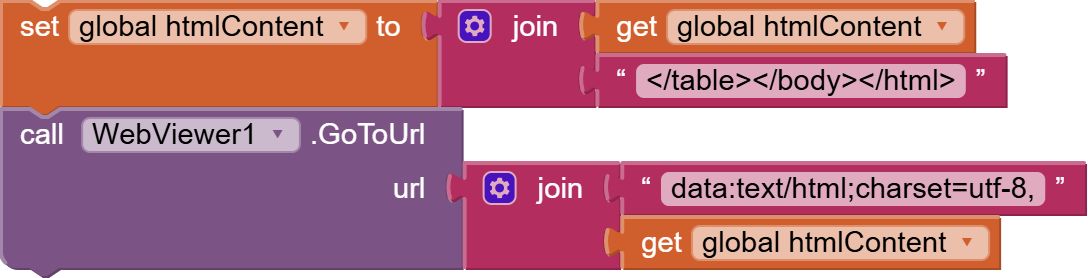
So the final makeTable looks like this:
and if you try your app, your table should be displaying.
So, this is done. I hope you liked this tutorial. You can also have a look at the video tutorial here:
Please like my videos and share it with your friends and family. Also, subscribe to my channel and press the bell icon so you don’t miss any of the great projects I have planned for you.
https://www.youtube.com/c/obsidiansofteducation
Please like my Facebook page and Instagram page for more educational resources and tips.
Facebook: https://www.facebook.com/ObsidianSoft/
Instagram: https://www.instagram.com/obsidiansoftapps/
Pinterest: https://www.pinterest.com/obsidiansoft/
For links to free educational apps, have a look at the educational apps page