Hello friends, and welcome to Obsidian Soft,
Today, in hopefully a short tutorial, I will teach you how you can copy camera images to the phone gallery and also delete camera pics.
The pictures taken by MIT App Inventor don’t automatically show up in the phone gallery. I restarted my device but still, they didn’t appear in the phone gallery. So, I tried copying the camera pictures to the shared pictures folder, and this worked! And the best thing is that I didn’t even need an extension. So, I thought that I should share my experience. I have tested my solution on an older device with Android 11 and a newer device with Android 14 and this worked on both. Using the same approach, you can also delete pictures taken by the camera component.
So, let’s begin. Open up MIT App Inventor and start a new project. Let’s call it saveDelPics.
Today, my focus is on code, so I will not spend too much time on the screen design.
Add an image component from the user interface to the viewer.
Make height 70% and width fill parent.
Add a horizontal arrangement below it. Make height 15% and width fill parent.
Add three buttons to it: a camera button, a Save to gallery button, and a delete button.
From the media palette, add a camera component.
From storage, add a file component.
For sensors, add a clock component. Turn off the timer enabled, and the timer always fires checkboxes. We just need to get the current time for naming our images.
Our simple screen design is done, so let’s go to the blocks section.
We need a few global variables.


imgPath is the path of the image returned by the camera component. We also need two variables for tempFileand finalImgName. When the camera button is clicked, we call camera’s Take picture procedure.

The take picture procedure will trigger the Camera’s after picture event. The image here represents the path of the image i.e. where it is located. We will use this image value to set our image component’s picture property and we will also store it in the imgPath global variable for later use in the saveBtn and delete btn click event.

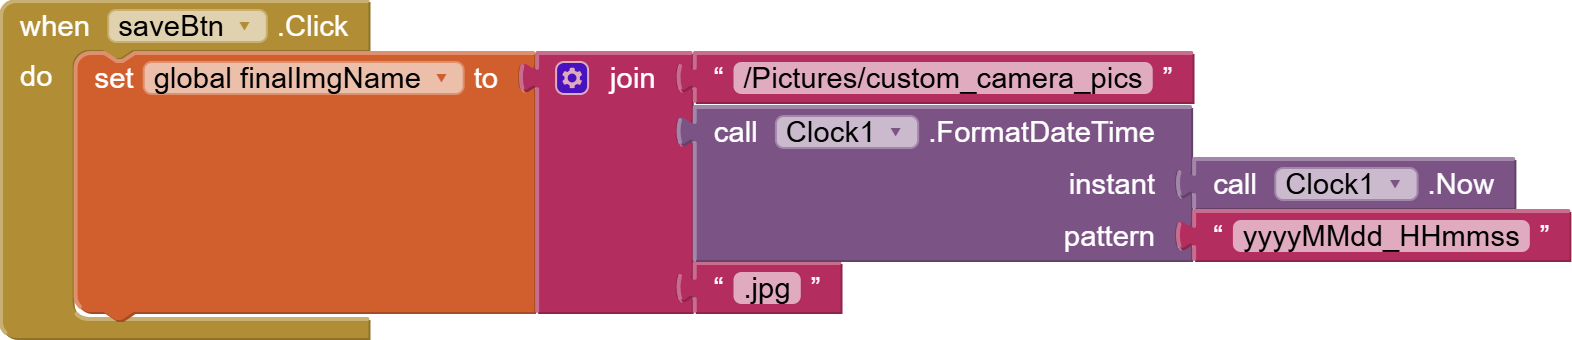
When the save button is clicked, we need to construct our finalImgName. This is how it will be named in the phone gallery. This is optional, and you don’t have to do this, but I thought that images in the phone gallery should have a time stamp in them too, along with where they are coming from. So, do a join of three things:
- /Pictures/custom_camera_pics
- Current time stamp (using formatdatetime and clock.now)
- .jpg
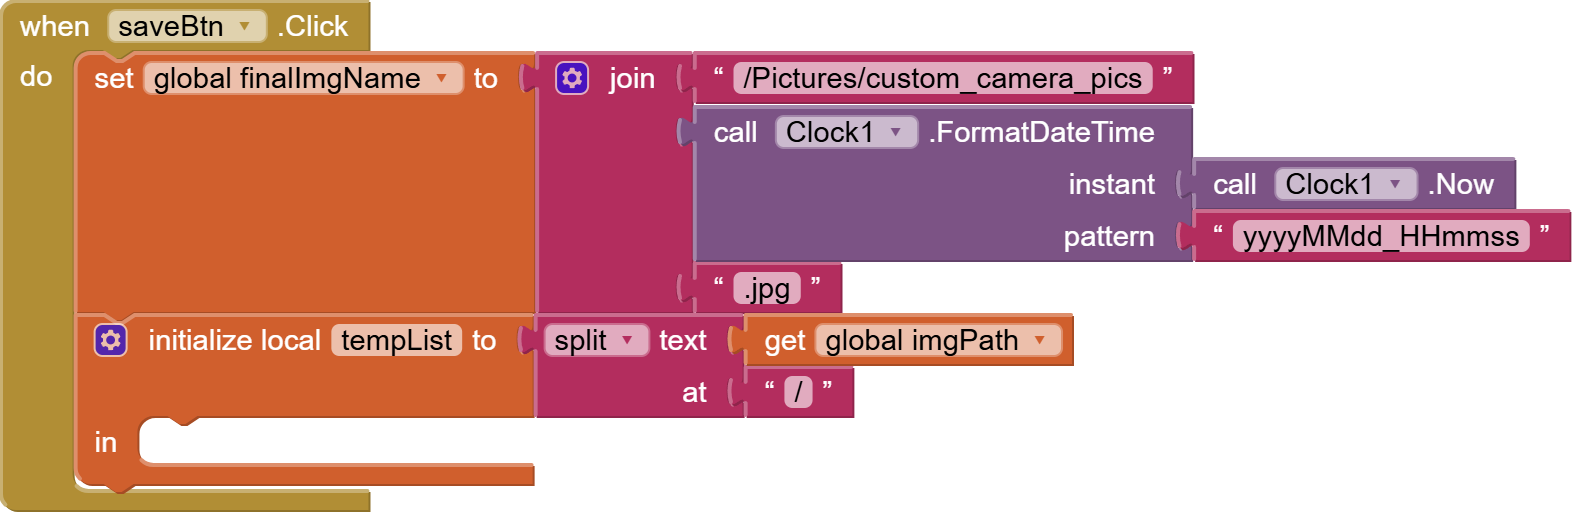
Now, we need to find the exact image name from the image path returned by the camera component. The image name is the last item in this path:
The path is usually like this:
file:///storage/emulated/0/Android/<your.app.package>files/Pictures/app_inventor<some_numbers>.jpg
The file name is the letters and numbers after the last “/” i.e. it starts with app_inventor and ends with .jpg so how to get that? We can split the image path at “/” and we will get a list and the last item in this list will be this unique image name.
Make a temporary list variable and provide it with this split list using split block from text blocks.
The tempList will contain items like:
[“file:”.””,””.”storage”,”emulated”.”0”……..”,”Pictures”,app_inventor349384083.jpg”]
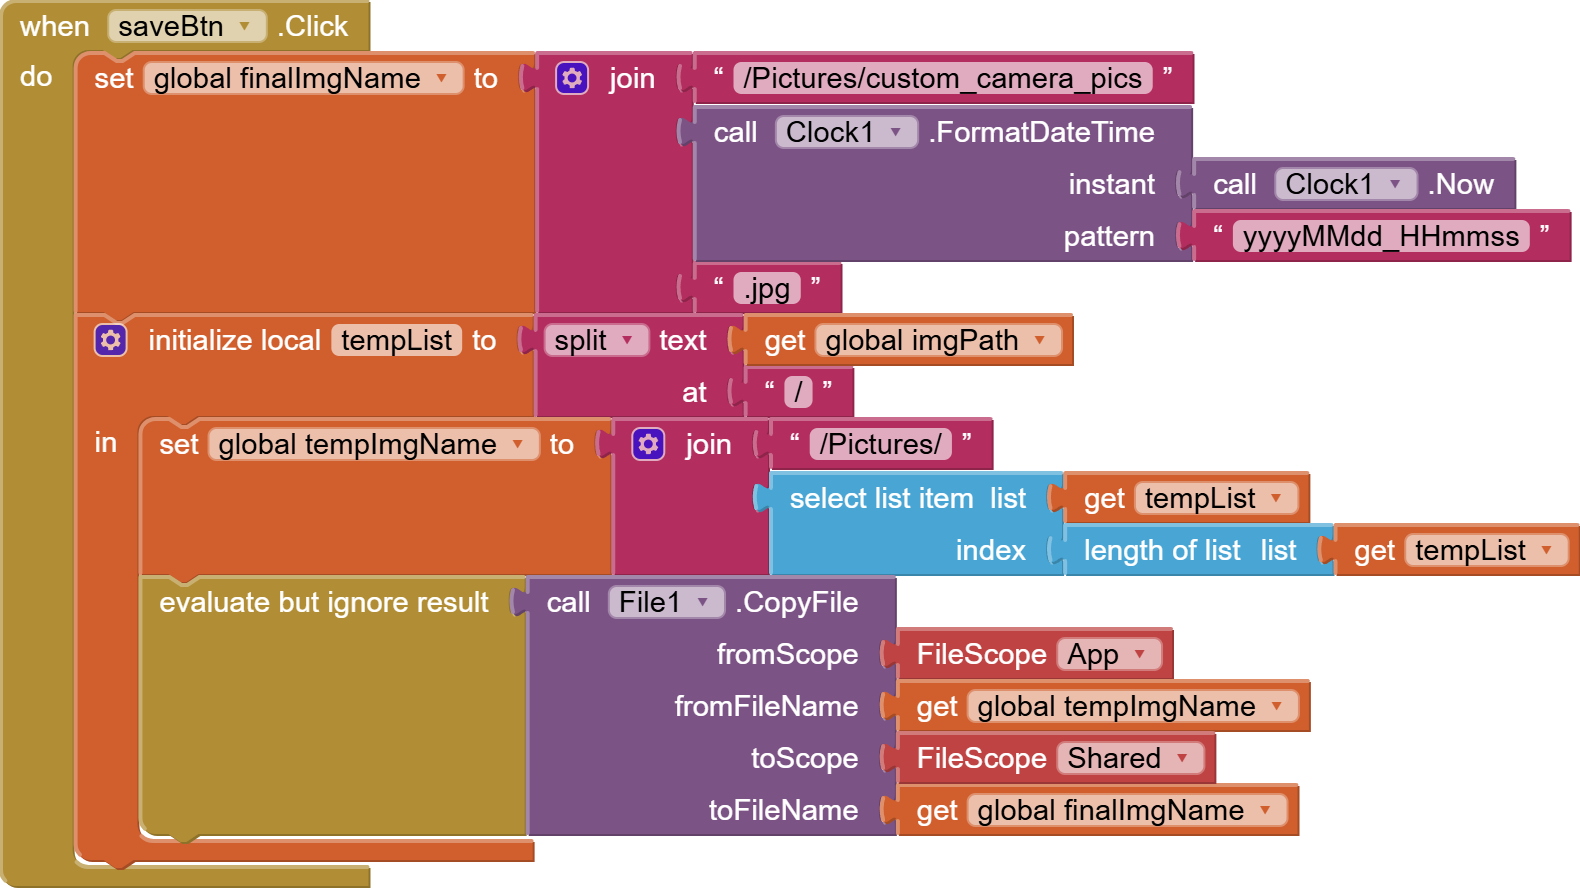
As you can see the last item is the image name. We will construct the tempImgName by doing a join of /Pictures/ and the last item in our tempList.We will then copy file from app filescope and tempImgName to shared file scope and final img name.
Similarly, we can delete images taken by the camera component.
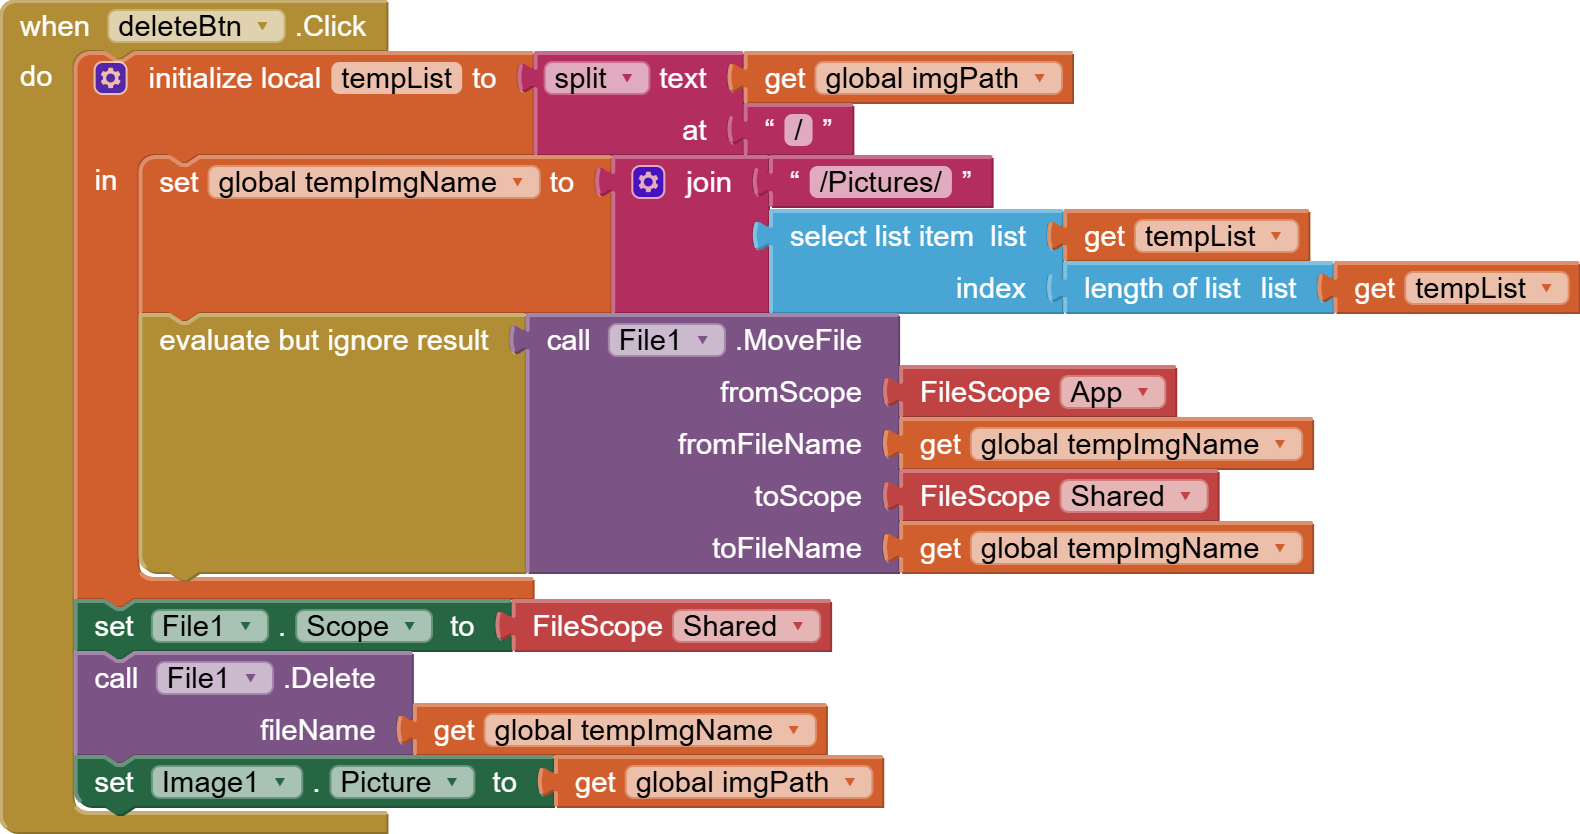
Now, the finalImgName is not needed as we are just temporarily moving images to the shared pictures folder and then deleting them. Notice the difference. In save to phone gallery, we were copying the image but here we are moving it. Setting the file.scope to shared file scope is super important before calling File.delete. You can see that deletion is successful by providing the old imgpath to image. picture, and since the image has been moved from there, the picture will now be empty. And if you check your phone gallery, it will not be there either. Another important thing is that if you click save to gallery before deleting then the image will only be deleted from your app’s internal storage but not from the phone gallery, as it will exist there with a different name. I hope this tutorial helps someone facing an issue in saving pictures to the phone gallery instantly or getting rid of pictures stored in the app storage.
Please like my videos and share it with your friends and family. Also, subscribe to my channel and press the bell icon so you don’t miss any of the great projects I have planned for you.
https://www.youtube.com/c/obsidiansofteducation
Please like my Facebook page and Instagram page for more educational resources and tips.
Facebook: https://www.facebook.com/ObsidianSoft/
Instagram: https://www.instagram.com/obsidiansoftapps/
Pinterest: https://www.pinterest.com/obsidiansoft/
For links to free educational apps, have a look at the educational apps page