Hello friends and welcome to Obsidian Soft,

In my last tutorial, I made a full app that took a picture using the camera component of MIT App Inventor and uploaded this pic to a folder in Google Drive as many of my viewers had requested for this tutorial.
Today, I will show you how to make our code so generic that we are effectively able to upload ANY type of file to Google Drive be it text, audio, video, or image.
This tutorial assumes that you have completed the picture uploading app i.e. part 1 of this tutorial as we wrote some essential script in it and we also made a public folder in Google Drive.
So, let’s begin…
Open up your UploadFileToGDrive project in MIT App Inventor and go to the blocks section.
First of all, let’s make a procedure for uploading files that takes in two inputs. Use the first procedure type from Procedures (the one that doesn’t return a result) and click on the cog wheel to add two inputs. Rename inputs to fileExt and filePath.

Now, let’s look at our uploadPicBtn code and try to make it more generic.
Look at this part:
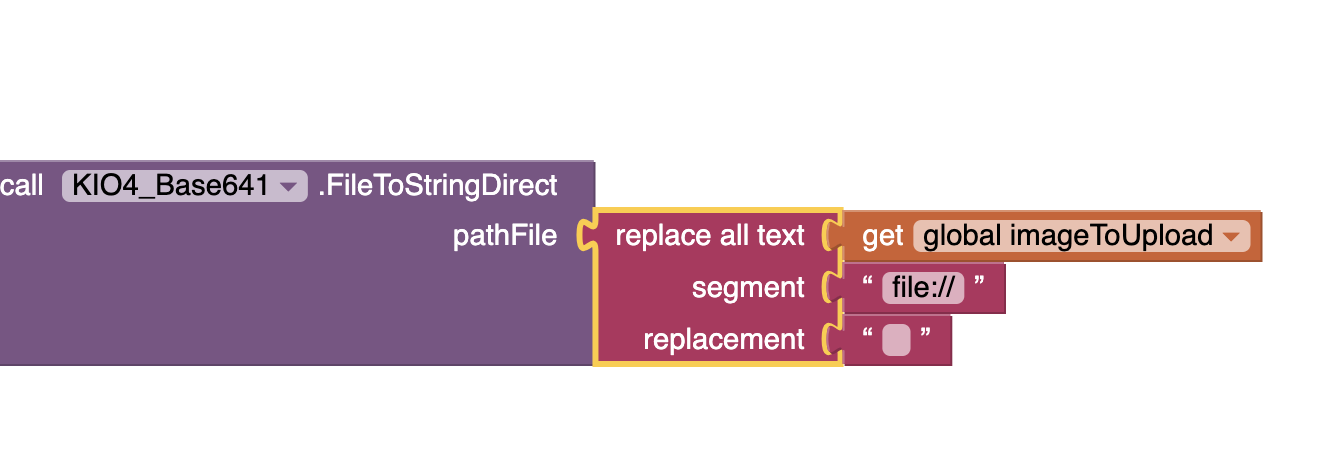
We are doing a special thing here by removing “file://” from the path of the saved camera image so how about we remove the correction of the image path from here and take it to the Camera’s AfterPicture event.
So, update your After Picture event to this:

This way we correct the path by removing file:// before assigning it to imageToUpload so it is correct from the very beginning.
Hence, we can directly give imageToUpload here in our uploadPicBtn Click event.

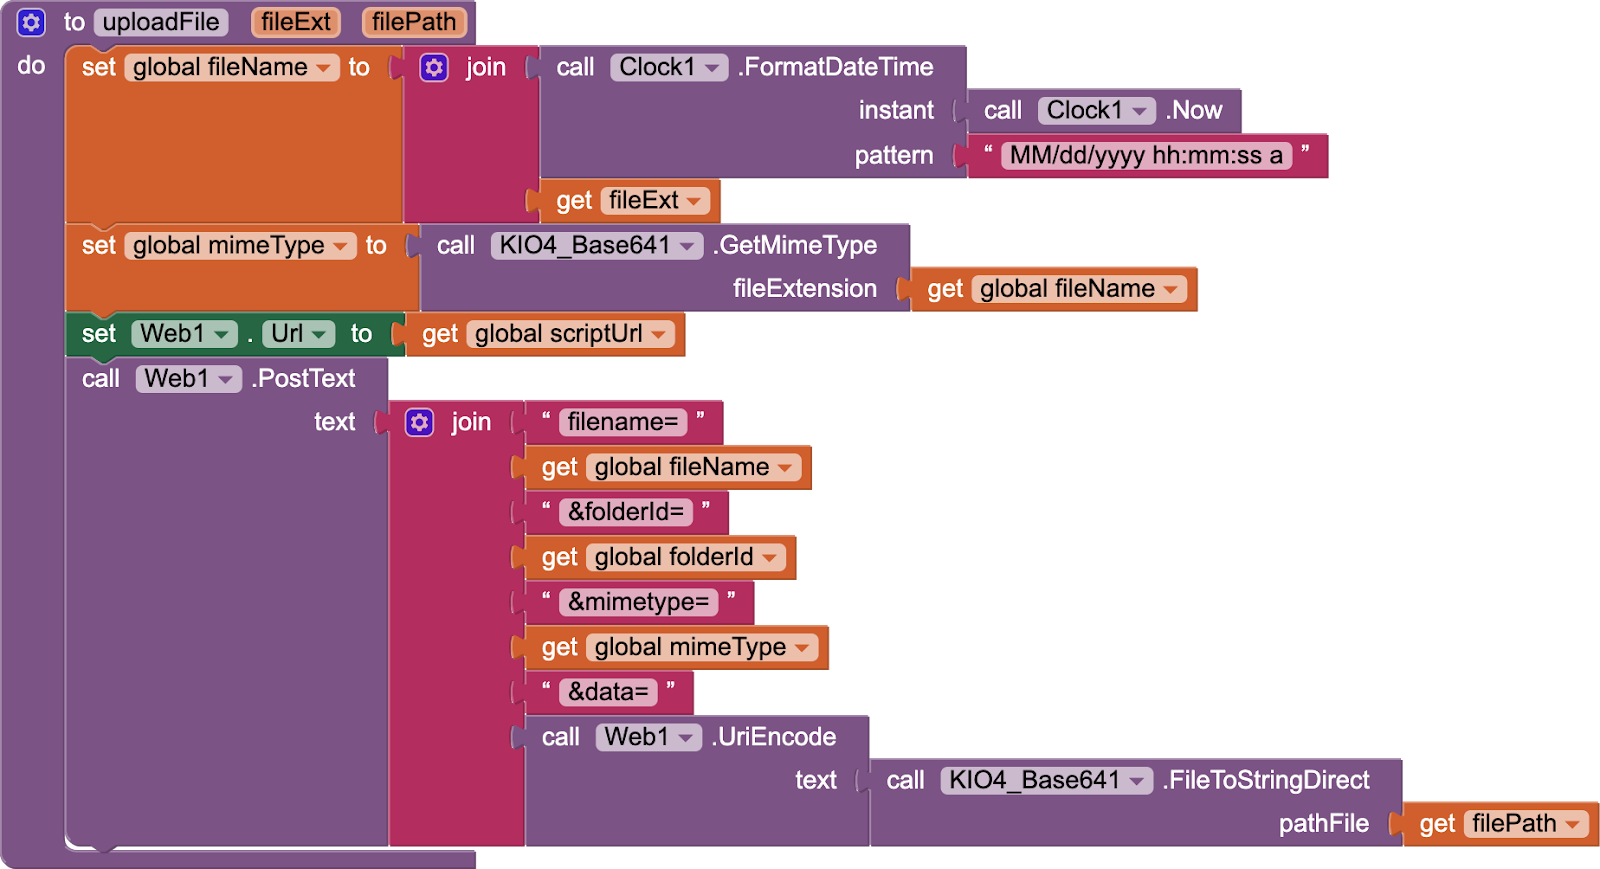
So, this is more or less generic now and we can move the entire uploadPicBtn code to our custom procedure uploadFile. Next, we modify it to remove all image-related parts.
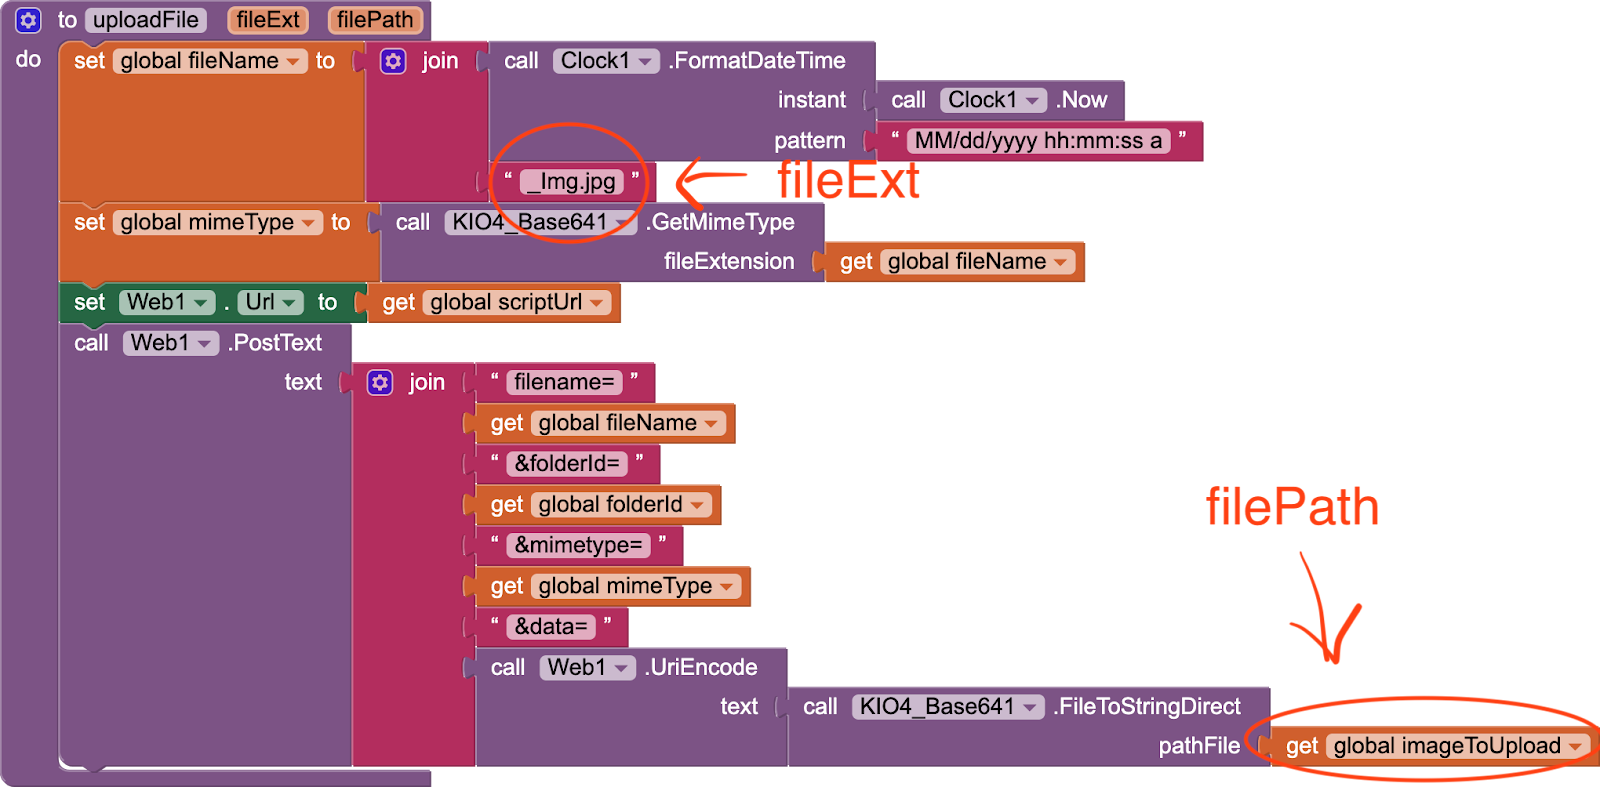
Our final uploadFile procedure looks like this:
But what about our uploadPicBtn code as it is empty now.
We have to call the procedure uploadFile and give it image-related information as input.

So, we can use this uploadFile procedure to upload any file as long as we know its file path.
So, let’s add some more components to our screen for uploading text and sound files by going to Designer View.
Drag and drop another horizontal arrangement from Layout below the camera buttons one. Make the width: fill parent, height: 13% and align horizontal and align vertical both center.
Drag and drop a textbox from the User Interface palette inside this second horizontal arrangement. In its properties, make it multiline. Drag and drop a button next to this textbox and rename it to saveTextFileBtn and change the text on it in its properties to “Save”.
Drag and drop another button next to the save button and rename it to uploadTextFileBtn and change the text to “Upload File”.
Select the second horizontal arrangement and duplicate it by pressing Ctrl + C and Ctrl + V on the keyboard for Windows OR Command + C and Command + V on the keyboard for MacOS.
Delete the text box from this arrangement. Rename the saveTextFileBtn2 to startRecBtn and change text in its properties to “Start Rec”. I am going to use the second button for two things: stopping the recording and uploading it simultaneously but you can have two buttons for this work!
So, rename it to stopRecUploadBtn and change the text in its properties to “Stop Rec & Upload”.
Now, drag a Sound Recorder component from the Media palette onto the viewer.
We also need a File component so get it from the Storage palette.
We have added all that we need for this project in the designer section so let’s go back to the blocks section.
When saveTextFileBtn is clicked, we want to save whatever is inside the Textbox as a text file.
So, use File’s saveFile procedure to do this. We need to provide a fileName but don’t be confused with our global fileName variable as that is for uploading the file with a unique name to Google Drive. The filename required by SaveFile procedure is for saving the file on your device. So, give some name prefixed by / to make sure that the file is shareable. If you don’t prefix it by /, it will be considered a private file and we will not be able to get the path for it. Also, do provide it a file extension i.e. “.txt”

The File component’s SaveFile procedure on successful completion, triggers the AfterFileSaved event that returns a fileName but we have a problem as this fileName contains just the file name that we provided when we pressed the save text file button and it doesn’t give us the path. Remember that our uploadFile procedure requires an absolute file path for any file that we want to upload to Google Drive.
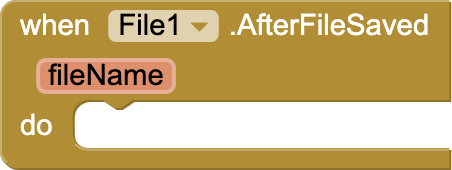
Fortunately, there is a procedure in our downloaded extension for getting the App-specific directory’s path where our text file was saved.
So, add the following code to AfterFileSaved event for setting the textFileToUpload (text file’s absolute path) to a join of app specific directory’s path and the fileName.

The uploadTextFileBtn code is the similar to uploadPicBtn code.

Last is our sound recording and uploading part.
When startRecBtn is clicked, call soundRecorder to start.

When the stop and upload button is clicked we will stop the sound recorder.

The stopping of the sound recorder will trigger the AfterSoundRecorded event. This will give us a sound variable which is actually the correct path of the recorded sound so we can use it safely without any changes in our uploadFile procedure.
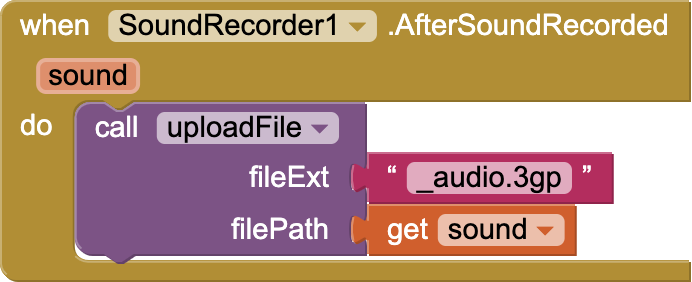
And we are done.
So, we have a custom procedure in this app that can upload a file created in our app to a public folder in our Google Drive.
I hope you liked this tutorial.
If you like my tutorials, consider supporting me:
You can also watch the video tutorial for this part on my channel: Obsidian Soft.
Please like my videos and share them with your friends and family. Also, subscribe to my channel and press the bell icon so you don’t miss any of the great projects I have planned for you.
https://www.youtube.com/c/obsidiansofteducation
Please like my social media pages for more educational resources and tips.
Facebook: https://www.facebook.com/ObsidianSoft/
Instagram: https://www.instagram.com/obsidiansoftapps/
Pinterest:
https://www.pinterest.co.uk/obsidiansoft/_created
For links to free educational apps, have a look at the educational apps page

