Hello friends and welcome to another tutorial by Obsidian Soft.
Today I will teach you how to generate stories and images to make videos for children totally free. There will be no download required or any software needed and it will be done completely online.

So, what are the steps?
1. Generate the story using chatGPT
2. Generate the images for it using Microsoft Bing AI where you can make 100 images in a day free
3. Generate speech from the story’s text using Capcut and also edit the video adding animations using Capcut (a free video editing software available online by TikTok)
So, let’s get started…
1. Story Generation using ChatGPT – Animated videos using AI
Open chat.openai.com.
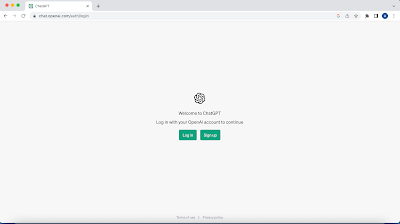
You will need to either login or sign up.
If you do not have an openAI account you can sign up easily using a Google account, Microsoft, or even an Apple account but you may need to provide a phone number where a code will be sent and you need to verify your phone number by providing the code.
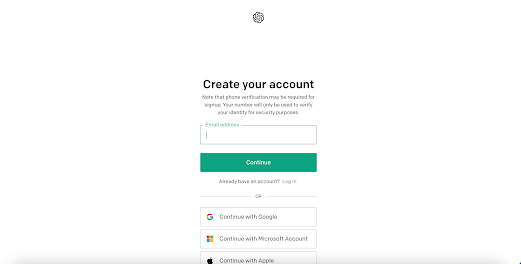
Once you sign up successfully or log in using an existing account, the following page will open up:
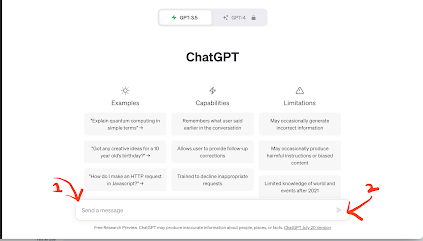
Write your story where it says “1” and then press the arrow button pointed out by “2”.
I wrote the following to get a story about a princess and an evil witch for children. I also asked it to generate image details along with the text that will come on each page or screen of the story (these image details are known as image prompts in the world of computing :))
Write a short story about a beautiful princess who fights an evil witch. This story is for 5-6 years old children. Divide the story into pages and give details about the image that should come on each page along with the text.
The following is an extract from the story that was generated by ChatGPT so now you can see the power of AI. Look at how cute the story is:
Title: The Brave Princess and the Wicked Witch
Page 1:
Image: A magical kingdom with a grand castle surrounded by colorful flowers and tall trees.
Text: Once upon a time, in a beautiful kingdom, there lived a kind and brave princess named Isabella. Her sparkling eyes and golden hair made her the most beautiful princess in the land.
Page 2:
Image: Princess Isabella talking to her animal friends, rabbits, squirrels, and birds, in a lush garden.
Text: Princess Isabella loved spending time in her enchanting garden, where she talked and played with her animal friends. She was loved by everyone for her gentle heart.
Page 3:
Image: The evil witch casting a dark spell with a cauldron full of green potion under the moonlight.
Text: But one dark night, an evil witch named Griselda arrived in the kingdom. She was jealous of Princess Isabella’s beauty and wanted to take it away.
Page 4:
Image: The princess looking worried while overhearing the villagers talking about the witch’s curse.
Text: The villagers warned Princess Isabella about the wicked witch’s curse, saying she would lose her beauty forever unless she defeated the witch.
Page 5:
Image: Princess Isabella setting off on a journey with a determined look, holding a magical amulet given by her fairy godmother.
Text: The brave princess knew she had to face the witch to protect her kingdom and her beauty. Her fairy godmother gave her a magical amulet to help her on her journey.
2. Image Generation using Bing – Animated videos using AI
Open up https://www.bing.com/create.

You can join and create by providing a Microsoft account so if you do not have one just create one; it’s not that difficult. Once you login, you will be shown the following page.

Go back to your story and copy the image prompt or image details for the first page and just paste it here now an important thing we have to provide is the style of the image so I am going to use the following style:
Cute Pixar style, noise reduction and fine details.realistic textures, cinema lights, color grading, retouching
This art style results in very nice Pixar-style images with interesting details and lighting. Just copy and paste it and place it after writing the image details from Chat GPT. You can generate 100 images in a day (as you can see that I have used some boosts so I have 88 remaining).
Press create and 4 images for your image prompt will be generated.

Choose the one that you like the most and download it to your computer.

Go back to your story and copy the image details for the second page and just paste it in the space for the image prompt but make sure that you do not remove the art style so that you continue with the same art style. Press create again and the image will be created. There will be four choices for you again so choose one and download. Do this process for all your pages and image prompts.
Now, we come to the last part of our video.
3. Speech Generating and Video Editing using Capcut
Go to capcut.com.

You can see that I can either edit the video online or download it. I will choose to edit the video online for this tutorial as I’m showing you a completely online way of making this animated story video.
You will be taken to the online editor. Click on upload button.
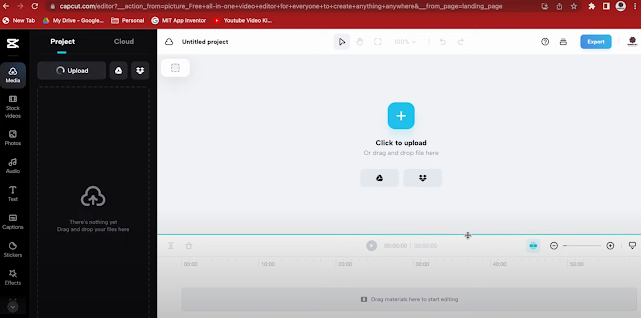
Since we haven’t signed in yet, it will ask us to continue with
Google or some other account. I chose my Google account to log in. I have noticed that the interface is very similar to canva.com.
So, again press upload and upload all the images that you generated using Bing AI. Choose the first image that should come in your story.

It will be automatically added to your video timeline as shown towards the bottom of the page. Extend the image by dragging it to the right so it makes the video about 10 seconds long. On average, an image should stay on the screen for 10 seconds because our story text on this page will be read in approximately this time.

Also, change the aspect ratio of the video. Right now, it is in squarish form but we want it in landscape form so choose 16:9 as the aspect ratio as shown below.

Now, let’s add the story text on the right side of the image. So, go to the text on the left-hand side and add body text.

Drag it toward the right-hand side and now go to your Chat GPT story and copy the text for page one and paste it back into the capcut body text. You will need to adjust it by adding some line breaks between the words so that it fits on the right hand side.

Once the text has been adjusted, centralize it by going to text T on the right-hand side and choosing Center.

Also, make it bold so that it stands out more.
Let’s add animation to this text by going to the Animation option (again on the right-hand side).
Choose IN (this means the starting animation).
and choose the animation style. I have chosen “Type 1” here.

You may need to increase the duration of this text on
the image by extending the orange text line in the timeline.

You may also need to slow down the duration of the animation so it looks nice.

Let’s add a speech to our video.
Choose text to speech option (again on the right-hand side)
Choose the voice that you like. I have chosen “Adorable Girl” here which is a voice of a little girl: it goes well with this story.
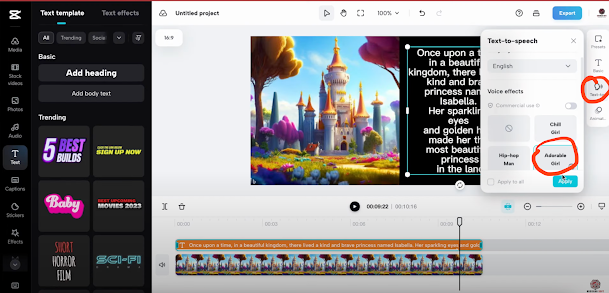
You may need to adjust the text part (orange segment in the timeline) and speech part (green segment in the timeline) for them to be appropriately synchronized.

The voice might have a few jitters while playing but it will be fine in the actual video.
Similarly, add the second image and repeat the same process.
You can also add animation to the image too.

Once you are satisfied with your video, press the blue export button. Once it is exported, you can download it by pressing the download button.
So, this is it…
The marvelous thing about Capcut.com is that there is no watermark and the speech generation is pretty cool and 100% free.
So, make amazingly cute story videos for children using this tutorial and publish it on YouTube and make good money 😉
If you like my tutorials, consider supporting me:
You can have a look at the video tutorial here:
Please like my videos and share them with your friends and family. Also, subscribe to my channel and press the bell icon so you don’t miss any of the great projects I have planned for you.
https://www.youtube.com/c/obsidiansofteducation
Please like my Facebook page and Instagram page for more educational resources and tips.
Facebook: https://www.facebook.com/ObsidianSoft/
Instagram: https://www.instagram.com/obsidiansoftapps/
Pinterest:
https://www.pinterest.co.uk/obsidiansoft/_created
For links to free educational apps, have a look at the educational apps page